Monday, August 27, 2018

Kuat Sherpa 2.0 Hitch Rack

Kuat has been an Iconic brand that I personally have been a fan of for quite some time. The only downfall was that being a teenager, I wasn’t exactly focused on managing money and was never able to afford one. Now that I put my big-boy pants on with a job and bills to pay, I have become a lot more conscious when it comes to spending and saving. One thing I knew I needed was a quality bike rack. Yes. You thought right. After saving up enough money I blew it all on a Kuat Sherpa 2.0 Hitch Rack. You might be thinking, “how many lunches did this guy miss to afford this rack?” Well, to be honest, not many. Cup of Noodles are a great meal replacement that really helps cut down how much you spend on food. I lost a bunch of weight eating only this for so long so it was a win-win in my eyes. That was a joke, but on the real, purchasing the Sherpa 2.0 Hitch Rack was one of the greatest ideas I have ever had.
Kuat Sherpa 2.0 Hitch Rack Review

Why I Chose The Sherpa 2.0

The Kuat Sherpa 2.0 Hitch Rack comes in a pearl white color. This happens to also match my 2018 Subaru Crosstrek almost perfectly. Without hesitation, I decided to keep everything matching and ordered the white rack. Most important to me was the fact that the rack fits all my bikes. A 20” BMX bike (recommend getting the adapter even though it does work without), a 26” Deity DJ, and a 29” Yeti SB4.5. Aside from that was the integrated bike lock. Riding BMX, I have learned not trust people, especially in some sketchy areas. The last reason was that I wanted something that looked good. A lot of racks look like sh*t and Kuat doesn’t make anything I would be ashamed to have on my car. This meant I needed to get a hitch installed on the car.
Kuat Sherpa 2.0 Hitch Rack Review

Installation

The rack finally showed up and I got to work on piecing it together. Installation was very easy and straightforward. Simply follow the instructions and you won’t have any issues! Really, just read the damn instructions. I don’t care how smart you think you are. All the needed tools were included along with all the hardware. The best part is that the hitch pin is actually the allen you use to tighten the rack together so the chances of you losing it as slim to none. The Hand-Tight Hitch Cam System made for a very secure fitting to the car. Overall, installation took me about 20-30 minutes with a few distractions. It is that easy! I would recommend having someone handy in case you need them to hold up one of the trays while you tighten the bolts.
Kuat Sherpa 2.0 Hitch Rack Review

First Use

I started off by first putting my 26” DJ on the back and driving through some rough terrain to make sure none of the bolts came loose. They didn’t and the rack did not fall off the car so it was time to party. The next day was our weekly Friday Night Ride. Chance and I loaded up the rack with the trail bikes and took off to Sycamore. The entire drive I was looking in the mirrors to make sure everything was running smooth. There was barely any movement in the rack and the bikes were a secure as they could ever be.

Kuat Sherpa 2.0 Hitch Rack Review
The Big Trip

Easton and I began our journey from the shop in Newbury Park, CA to Boulder, CO where we would stop and ride some sweet trails along the way. When we left I made sure everything was secure with the rack and from installation, nothing had become loose. We mounted our 2 trail bikes and took off. Driving through California to Nevada was a breeze but once we got into Nevada and Utah the road conditions were much harsher than anticipated. The rack continued to hold true. We experienced Monsoons, 115+ degree weather, dust storms and spontaneous off-road adventures and the rack still held true. No rust formed and the paint did not pit or chip. The easy to use foot assisted lever was very convenient and allowed for the bikes to be kept on the rack to access the back of the car.
Kuat Sherpa 2.0 Hitch Rack Review

Final Impression

I am extremely happy with the Kuat Sherpa 2.0 Hitch Rack. Looking back, I don’t think that I would have been happier with any other rack. It does exactly what I need it to and I trust the security and durability of the rack. The only thing I am missing is the Kuat Pivot Hitch. Hopefully, I will snag one of those in the next couple months to make accessing the back of the car that much easier. The only downfall I experienced so far was the visibility through the rear window when certain bikes are held on the rack. Obviously this isn't a flaw in the rack but depending on what bike you have, you might experience a loss in visibility through your rear window. If you have been debating whether or not you need one of these racks or you are afraid that your wife will think it’s a stupid purchase, just do it.
As the snow starts to fall here in Summit County, don’t panic… you can still get some riding in before winter is in full swing!
Here are some of our TOP 5 places to ride until we’re all shoveling snow…

Moab, Utah

Distance from Summit County: 4h 45m
Why we like it:
Moab has trails that range for all levels of mountain bikers. From Newbie to pro – there is going to be something that challenges you! Not to mention the amazing views and ability to set up a campsite and stay for a few days!

Fruita, Colorado

Distance from Summit County: 3h 15m
Why we like it:
Fruita is a bit closer than Moab, so many like it for it’s proximity – the trails and campsite positions make it a great family friendly spot to ride around for a few days.

Eagle, Colorado

Distance from Summit County: 1h 15m
Why we like it:
The close proximity makes Eagle a wonderful day trip to do some riding outside of the snow covered trails here in Breck.

Sedona, Arizona

Distance from Summit County: 11h
Why we like it (& why we think you should make the journey):
Sedona is a world renown location for winter riding in the desert. There are many sites to camp, eat, or lodge – and the weather is amazing year round with a sun that keeps the cooler temperatures at bay.
For new riders, there are several mountain bike tours available to assist in exploring the area.

Salida, Colorado

Distance from Summit County:  1h 45m
Why we like it:
Salida is actually known as a bike town through and through. Not only are the off-road trails groomed perfectly, but in town there are many roads and paths that run throughout town for more mellow path rides as well.

Tuesday, August 21, 2018

Yesterday we took delivery of the new Kuat NV 2.0 base bike rack in matte black. We’ll be leaving this on the back of our bike hauler over the coming weeks to see how it performs and stands up to the elements.
This Base 2.0 shares a lot of the same elements with the regular NV 2.0 minus the integrated repair stand so it carries a little bit lower price than their flagship model ($549 vs. $629). Look for some updates on this rack as we put it through the paces of normal bike transportation.
Details:

Thursday, August 16, 2018

RockShox Reverb Adjustable Seat Post

Adjustable height, telescoping seat posts have taken the industry by storm over the past year. While Gravity Dropper used to be the only game in town in this segment, other big names in the industry like RockShox, Fox and Crank Brothers are now throwing their hat in the ring. It seems like every big company to specialty manufacturers are jumping on the bandwagon with their latest and greatest in a part of the industry people used to make fun of. That is…until they started seeing pro XC racers actually riding them or they tried one for themselves.

Why do you need a telescoping seat post?

Back when I used to run the Gravity Dropper, almost everyone that saw it thought I was running a suspension seat post. Even when I would explain what the seat post did, riders would ask “why when you have a QR” or call it a cheater post. Most of these comments were coming from riders who had never ridden a telescoping seat post before.
Fast forward to now…and everyone wants one, but why is that? To really have complete control of your mountain bike while heading downhill, you need to have the seat out of the way so you can get your weight back and maneuver the bike. You can go faster with more control. It is a proven fact by downhill racers and AM giants.
However, this creates one large problem for AM and XC riding. It is very time consuming to raise and lower your seat all of the time. Even when you actually take the time to do it, you are never guaranteed to get your seat back to the perfect height for climbing.
Enter the telescoping, adjustable seat post.
With a quick flick of a switch on your handlebar, you now have complete control of your saddle height. Even if you want to put it down for a quick set of rollers on the trail, you know can with ease…and you will. Riders are always amazed how much they actually end up changing saddle height while they ride when they ride a telescoping seat post for the first time then on subsequent rides. It really transforms your riding in ways that were previously impossible with a conventional seat post setup.

RockShox Reverb in the Box

First Look: RockShox Reverb Seat Post

One of the latest offerings in this market segment is from the SRAM and RockShox camp. While this should be no surprise to anyone as RockShox develops incredible suspension technology, RockShox did take their time getting into this market by bringing a solid product off the bat.

What’s In The Box: RockShox Reverb
Driven by hydraulic pressure, the RockShox Reverb comes packaged with everything you need to mount and maintain the seat post. Extra fluid, the syringes, seat post clamp and zip ties…it’s all there.

RockShox Reverb Saddle Mount
The all black design of the Reverb will match most bikes and the seat mounting system is a two bolt design like you find on many posts these days including Thomson.

RockShox Reverb Remote
The remote for the Reverb should be very familiar to those of you that rock lockouts for your RockShox forks. It uses the same push in button design and is adjustable with the silver barrel adjuster.

RockShox Reverb Size
The test unit came in to fit our Turner 5.Spot at 30.9 with a 380mm length and 125mm overall drop.
Now…all that is left is to install it on the 5.Spot and get it out on the trail. We’ll keep you guys updated on the progress and how it compares to the other seat posts we have ridden.

RockShox Reverb Specifications (from RockShox.com)

Weight 100mm: 535g , 125mm: 520g, *Weight based on 355mm length, 30.9mm diameter, MMX remote with shifter hardware and 1300mm hose
Length 100mm: 355, 420mm, 125mm: 380mm, 420mm
Colors Black, Silver
Material Shaft: 3D Forged 7050 Alloy, Head: 7050 Forged Alloy
Finish Anodized
Other Zero Offset / 2-Bolt, Reverb Remote Actuation: Adjustable return speed at the handlebar
Available in Travel: 125mm and 100mm, Diameters: 30.9mm and 31.6mm

Wednesday, August 8, 2018

What exactly is “holistic health”? 


It’s not just about nutrition or acupuncture or massage therapy. Holistic health is an approach to healthcare that considers the “whole” person and all aspects of the body and mind. There is no single aspect of your life to focus on, no one cure-all for your problems. It is not necessarily about losing weight or getting to the gym. It’s about finding balance across your life, as a whole, and in the process, finding health and happiness too.
How does one actually do this? Of course, there is no single answer that works for every person. One important aspect of holistic health is that we must take responsibility for our own well-being. Personally, I know that spending time outside is integral to my mental health. I can’t spend too many hours between four walls before I start to feel anxious and restless. Whether I am hiking, skiing, rock climbing, cycling or just sitting in my camp chair with my feet up, I need the great outdoors to feel satisfied in my life.
While this certainly won’t be the same for everyone, there is a definite correlation between time spent outside, physical activity and mental health. Proximity to green spaces reduces stress and depression. Absorbing vitamin D from the sun will improve your mood and reduce anxiety. And of course, regular exercise will support both mental and physical health,improve your quality of sleep, and help ward off heart disease, diabetes and obesity.
So, what does holistic health mean for you? Perhaps you’re like me and making time for scenic hikes and fresh air will bring you peace of mind. I challenge you to think about what in your life brings you lasting happiness and satisfaction. How can you find more time in your daily life for these activities? And conversely, what areas of your life do you feel could be improved upon?  If you frequently find yourself feeling stressed and anxious, consider downloading an app to help you learn to meditate. If you’re looking for more wholesome, nutritious meals for you and your family, a holistic nutritionist could help point you in the right direction. Are you feeling lonely or far away from your loved ones? Try setting a weekly date to catch up with someone you are missing. Happiness is a crucial component to one’s health and will improve your quality of life in more ways than you can imagine.
Holistic health is a lifestyle. Take charge of your life by finding healthy ways to nourish your body and mind.

Running Sunglasses for Summer


Everyone knows that running shoes are personal, but guess what? Running sunglasses are too. Finding a pair that perfectly fits your face, doesn’t slide down your sweaty nose, and still offers up the protection—and visibility—that you need while traversing trail or road can be difficult. But we’re here to make the hunt a little easier. Here are seven of the best running sunglasses currently on the market. And the best part: They look good, too.


Oakley Outpace — $173

These sunglasses held up to a myriad of sunny speed workouts, and the no-slip ear- and nose-pads help them truly stand up to the product name once the miles got super-sweaty. Yes, they’re equipped with Oakley’s famous Prizm technology to enhance details on the road, but the  extended field of view and side shields also work to combat glare. Plus, the ventilated lens allows for plenty of airflow that prevents fogging. But the best part is, hands down, the fact that the frame and temple design are hat-compatible—meaning there’s no need to choose between your preferred form of sun protection. Now you can have both.


Zeal Incline — $149

Inspired by those looking to clock speedy times on downhill adventures, the Zeal Optics team designed these Incline sunglasses so that nothing would weigh you down. They house their famous Z-lite frames that weigh less than an ounce, so you’ll pretty much forget that they’re on your face. Plus, they have polarized lenses that help blues and greens really pop, and a bio-plastic frame that won’t harm the environment.


Adidas Tempest — $120

With a sporty take on the trendy cat-eye lens, these frames are both functional and fashionable so you can wear them straight from your long run to those afternoon plans (though maybe give them a wipe-down first so they’re not so sweaty). The polycarbonate lenses weigh a mere half-ounce, are scratch-resistant and are even compatible with RX prescription lenses (order via SportRx) so you can skip the contacts and head straight for the door.


Smith Lowdown Focus Slim — $349

These sunglasses are definitely a splurge, but the built-in technology is worth it: the frames connect to the brand’s Smith Focus App and, using brain-sensing technology, measures how focused you are on your workout. It then dishes out real-time feedback that helps you stay in the zone. The shades also house the brand’s proprietary ChromaPop technology, providing more clarity so you can better differentiate colors often found in nature while you’re on the move.


Roka Phantom TI — $260

Everyone loves the look of a classic aviator frame, and these lightweight specs hold up to brutal sweat-tests, too. The titanium frames come in a variety of colors, weigh less than an ounce and are of course polarized for optimal visibility. And with fingerprint- and scratch-resistant lenses—along with multidirectional, no-slip ear and nose grips—they’re perfect for both long runs and fast laps around the track.


 District Vision Nako — $199

With advanced sports lenses that are engineered for trail running, these sunglasses provide better visibility during changing light conditions, are shatter- and scratch-proof, and have a hypoallergenic nosepad to all but guarantee a comfortable run. They’re also water and oil repellent as well. To make you feel even more confident in your purchase, District Vision put these sunglasses through a two-year testing period with various athletes, meaning they’re truly ready to be put through your paces.

Photo Credit: Native Eyewear

Native Sixty-Six — $149

For those who want sunglasses that can perform without the super-technical look, these sunglasses can easily transition between short runs and social plans. Native’s N3 polarized lens technology claims to block up to four times more infrared light than regular polarized lenses, offer up UV protection, and filter rays so you have clear sight of your surroundings. The frames also have a lifetime warranty, so there’s no chance of these breaking on you before you’ve really put them to good use.

Sunday, August 5, 2018

Colorado’s Bicycle Law Now Includes Electric Bikes

On August 9, 2017, the Colorado law that regulates the operation of bicycles in our State changed again based on the advent of electrical assisted bicycles or “e-bikes.” E-bikes have gained in popularity over the years and there has been a push by the bike industry and People for Bikes to have uniform legislation nationwide so it will be easier to know where to ride each type of e-bikes.
The controlling statute in Colorado for most of the bike laws is C.R.S. Section 42-4-1412* and for electric bikes as defined in C.R.S. Section 42-1-102. This statute was expanded to add the 3 categories or classes of E-bikes. E-bike Class I is for a pedal assist and provides electrical assistance up to 20 mph. E-bike Class II provides electrical power when the rider is pedaling or not and stops giving power when the e-bike reaches the speed of 20 mph. E-bike Class III provides electrical power up to 28 mph. In Colorado, Category I and II can be ridden on a bike, pedestrian or multi-use paths. Class III can only be ridden on public roads. Also note that Class 3 E-bikes are not allowed for riders under age 16, and the law also requires the rider or passenger of a Class 3 E-bike under age 18 to wear a bike helmet with the strap in place while the Class 3 E-bike is in motion. I recommend that all cyclists and passengers wear helmets (e-bike or not), but the law only has the specific rule for the Class 3 e-bikes at this time.

Local Colorado Towns have Different E-Bike Laws
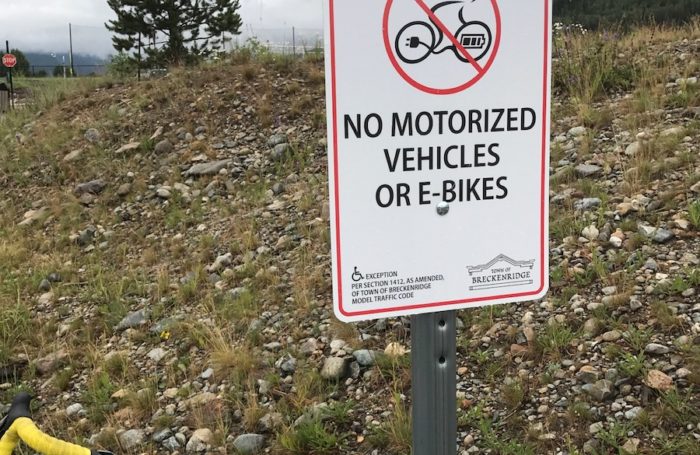
Breckenridge E-Bike Laws
Local cities and towns have the last word and control on where electric bikes can be ridden. For example, Breckenridge has a great system of bicycle paths and trails. The most popular bicycle path that connects Breckenridge to Frisco does not allow electric bikes. To give more context, this bicycle path has never allowed motor vehicles to be used, so not allowing electric bikes was a step that the Town Breckenridge decided to make for the safety of the path (or facility as the town planners call it) users.
Many cities and towns have yet to have a specific rule for e-bikes, so then the State Law controls the use of electric bikes.
Electric bikes are the future and Colorado is leading the way to make them more accessible and regulated so they will be a viable mode of transportation into the future.

Colorado E-Bike Laws

* § 42-4-1412. Operation of bicycles and other human-powered vehicles [Effective 8/9/2017] 
(1) Every person riding a bicycle or electrical assisted bicycle shall have all of the rights
and duties applicable to the driver of any other vehicle under this article, except as to
special regulations in this article and except as to those provisions which by their nature
can have no application. Said riders shall comply with the rules set forth in this section
and section 42-4- 221, and, when using streets and highways within incorporated cities
and towns, shall be subject to local ordinances regulating the operation of bicycles and
electrical assisted bicycles as provided in section 42-4- 111.
(2) It is the intent of the general assembly that nothing contained in House Bill No. 1246,
enacted at the second regular session of the fifty-sixth general assembly, shall in any
way be construed to modify or increase the duty of the department of transportation or
any political subdivision to sign or maintain highways or sidewalks or to affect or
increase the liability of the state of Colorado or any political subdivision under the “Colorado Governmental Immunity Act”, article 10 of title 24 , C.R.S.
(3) No bicycle or electrical assisted bicycle shall be used to carry more persons at one time
than the number for which it is designed or equipped.
(4) No person riding upon any bicycle or electrical assisted bicycle shall attach the same or
himself or herself to any motor vehicle upon a roadway.
(5)
(a) Any person operating a bicycle or an electrical assisted bicycle upon a roadway
at less than the normal speed of traffic shall ride in the right-hand lane, subject
to the following conditions:
(I) If the right-hand lane then available for traffic is wide enough to be
safely shared with overtaking vehicles, a bicyclist shall ride far enough
to the right as judged safe by the bicyclist to facilitate the movement of
such overtaking vehicles unless other conditions make it unsafe to do
so.
(II) A bicyclist may use a lane other than the right-hand lane when:
(A) Preparing for a left turn at an intersection or into a private
roadway or driveway;
(B) Overtaking a slower vehicle; or
(C) Taking reasonably necessary precautions to avoid hazards or
road conditions.
(III) Upon approaching an intersection where right turns are permitted and
there is a dedicated right-turn lane, a bicyclist may ride on the left-
hand portion of the dedicated right-turn lane even if the bicyclist does
not intend to turn right.
(b) A bicyclist shall not be expected or required to:
(I) Ride over or through hazards at the edge of a roadway, including but
not limited to fixed or moving objects, parked or moving vehicles,
bicycles, pedestrians, animals, surface hazards, or narrow lanes; or
(II) Ride without a reasonable safety margin on the right-hand side of the
roadway.
(c) A person operating a bicycle or an electrical assisted bicycle upon a one-way
roadway with two or more marked traffic lanes may ride as near to the left-hand
curb or edge of such roadway as judged safe by the bicyclist, subject to the
following conditions:
(I) If the left-hand lane then available for traffic is wide enough to be
safely shared with overtaking vehicles, a bicyclist shall ride far enough
to the left as judged safe by the bicyclist to facilitate the movement of
such overtaking vehicles unless other conditions make it unsafe to do
so.
(II) A bicyclist shall not be expected or required to:
(A) Ride over or through hazards at the edge of a roadway,
including but not limited to fixed or moving objects, parked
or moving vehicles, bicycles, pedestrians, animals, surface
hazards, or narrow lanes; or
(B) Ride without a reasonable safety margin on the left-hand side
of the roadway.
(6)
(a) Persons riding bicycles or electrical assisted bicycles upon a roadway shall not
ride more than two abreast except on paths or parts of roadways set aside for
the exclusive use of bicycles.
(b) Persons riding bicycles or electrical assisted bicycles two abreast shall not
impede the normal and reasonable movement of traffic and, on a laned
roadway, shall ride within a single lane.
(7) A person operating a bicycle or electrical assisted bicycle shall keep at least one hand on
the handlebars at all times.
(8)
(a) A person riding a bicycle or electrical assisted bicycle intending to turn left
shall follow a course described in sections 42-4- 901(1), 42-4- 903, and 42-4-
1007 or may make a left turn in the manner prescribed in paragraph (b) of this
subsection (8).
(b) A person riding a bicycle or electrical assisted bicycle intending to turn left
shall approach the turn as closely as practicable to the right-hand curb or edge
of the roadway. After proceeding across the intersecting roadway to the far
corner of the curb or intersection of the roadway edges, the bicyclist shall stop,
as much as practicable, out of the way of traffic. After stopping, the bicyclist
shall yield to any traffic proceeding in either direction along the roadway that
the bicyclist had been using. After yielding and complying with any official
traffic control device or police officer regulating traffic on the highway along
which the bicyclist intends to proceed, the bicyclist may proceed in the new
direction.
(c) Notwithstanding the provisions of paragraphs (a) and (b) of this subsection (8),
the transportation commission and local authorities in their respective
jurisdictions may cause official traffic control devices to be placed on roadways
and thereby require and direct that a specific course be traveled.
(9)
(a) Except as otherwise provided in this subsection (9), every person riding a
bicycle or electrical assisted bicycle shall signal the intention to turn or stop in
accordance with section 42-4- 903 ; except that a person riding a bicycle or
electrical assisted bicycle may signal a right turn with the right arm extended
horizontally.
(b) A signal of intention to turn right or left when required shall be given
continuously during not less than the last one hundred feet traveled by the
bicycle or electrical assisted bicycle before turning and shall be given while the
bicycle or electrical assisted bicycle is stopped waiting to turn. A signal by
hand and arm need not be given continuously if the hand is needed in the
control or operation of the bicycle or electrical assisted bicycle.
(10)
(a) A person riding a bicycle or electrical assisted bicycle upon and along a
sidewalk or pathway or across a roadway upon and along a crosswalk shall
yield the right-of- way to any pedestrian and shall give an audible signal before
overtaking and passing such pedestrian. A person riding a bicycle in a
crosswalk shall do so in a manner that is safe for pedestrians.
(b) A person shall not ride a bicycle or electrical assisted bicycle upon and along
a sidewalk or pathway or across a roadway upon and along a crosswalk where
such use of bicycles or electrical assisted bicycles is prohibited by official
traffic control devices or local ordinances. A person riding a bicycle or
electrical assisted bicycle shall dismount before entering any crosswalk where
required by official traffic control devices or local ordinances.
(c) A person riding or walking a bicycle or electrical assisted bicycle upon and
along a sidewalk or pathway or across a roadway upon and along a crosswalk
shall have all the rights and duties applicable to a pedestrian under the same
circumstances, including, but not limited to, the rights and duties granted and
required by section 42-4- 802.
(d) (Deleted by amendment, L. 2005, p. 1353, §1, effective July 1, 2005.)
(11)
(a) A person may park a bicycle or electrical assisted bicycle on a sidewalk unless
prohibited or restricted by an official traffic control device or local ordinance.
(b) A bicycle or electrical assisted bicycle parked on a sidewalk shall not impede
the normal and reasonable movement of pedestrian or other traffic.
(c) A bicycle or electrical assisted bicycle may be parked on the road at any angle
to the curb or edge of the road at any location where parking is allowed.
(d) A bicycle or electrical assisted bicycle may be parked on the road abreast of
another such bicycle or bicycles near the side of the road or any location
where parking is allowed in such a manner as does not impede the normal and
reasonable movement of traffic.
(e) In all other respects, bicycles or electrical assisted bicycles parked anywhere
on a highway shall conform to the provisions of part 12 of this article
regulating the parking of vehicles.
(12)
(a) Any person who violates any provision of this section commits a class 2
misdemeanor traffic offense; except that section 42-2- 127 shall not apply.
(b) Any person riding a bicycle or electrical assisted bicycle who violates any
provision of this article other than this section which is applicable to such a
vehicle and for which a penalty is specified shall be subject to the same
specified penalty as any other vehicle; except that section 42-2- 127 shall not
apply.
(13) Upon request, the law enforcement agency having jurisdiction shall complete a report
concerning an injury or death incident that involves a bicycle or electrical assisted
bicycle on the roadways of the state, even if such accident does not involve a motor
vehicle.
(14)
(a)
(I) a person may ride a class 1 or class 2 electrical assisted bicycle on a
bike or pedestrian path where bicycles are authorized to travel.
(II) A local authority may prohibit the operation of a class 1 or class 2
electrical assisted bicycle on a bike or pedestrian path under its
jurisdiction.
(b) A person shall not ride a class 3 electrical assisted bicycle on a bike or
pedestrian path unless:
(I) The path is within a street or highway; or
(II) The local authority permits the operation of a class 3 electrical
assisted bicycle on a path under its jurisdiction.
(15)
(a) A person under sixteen years of age shall not ride a class 3 electrical assisted
bicycle upon any street, highway, or bike or pedestrian path; except that a
person under sixteen years of age may ride as a passenger on a class 3
electrical assisted bicycle that is designed to accommodate passengers.
(b) A person shall not operate or ride as a passenger on a class 3 electrical
assisted bicycle unless:
(I) Each person under eighteen years of age is wearing a protective
helmet of a type and design manufactured for use by operators of
bicycles;
(II) The protective helmet conforms to the design and specifications set
forth by the United States consumer product safety commission or
the American Society for Testing and Materials; and
(III) The protective helmet is secured properly on the person’s head with
a chin strap while the class 3 electrical assisted bicycle is in motion.
(c) A violation of subsection (15)(b) of this section does not constitute negligence
or negligence per se in the context of any civil personal injury claim or lawsuit
seeking damages.
Cite as C.R.S. § 42-4- 1412
(28.5) “Electrical assisted bicycle” means a vehicle having two or three wheels,
fully operable pedals, and an electric motor not exceeding seven hundred
fifty watts of power. Electrical assisted bicycles are further required to
conform to one of three classes as follows:
(a) “Class 1 electrical assisted bicycle” means an electrical assisted bicycle
equipped with a motor that provides assistance only when the rider is
pedaling and that ceases to provide assistance when the bicycle reaches a
speed of twenty miles per hour.
(b) “Class 2 electrical assisted bicycle” means an electrical assisted bicycle
equipped with a motor that provides assistance regardless of whether the
rider is pedaling but ceases to provide assistance when the bicycle reaches
a speed of twenty miles per hour.
(c) “Class 3 electrical assisted bicycle” means an electrical assisted bicycle
equipped with a motor that provides assistance only when the rider is
pedaling and that ceases to provide assistance when the bicycle reaches a
speed of twenty-eight miles per hour.

Thursday, August 2, 2018

One of the best tech advances in mountain biking is the dropper seat post and every bike should have one. Yes…even your rigid single speed or crazy light XC race bike. I am going to tell you why.
Before we get into the straight up details…let’s play a little game. Let’s say you saw this downhill bike setup. What would you tell the rider?

How about this BMX bike at  your local park or jump track?

Or how about a really fun one…this dirt bike setup…

You would think they were all crazy right? Why the hell do they have the seat so high? It is just going to get in the way and it is not natural.
However, that is how mountain bikes have been treated for years. So let’s look at why that is the case and how the dropper post has changed mountain biking forever.

Why is our seat so high up to begin with?

The simple answer…we don’t have a motor. We are possibly the only offroad sport that has to use our legs to get where we are going. A lot of times this equals a lot of time in the saddle climbing and pedaling to get to our favorite sections of trail. To fully optimize this setup, our legs have to be slightly bent at full extension with our knee slightly over the balls of our foot. You know all of the bike fitment rules. It gives us the most efficient pedal stroke — while seated — so we can get the most power to the ground as efficiently as we can. It allows us to ride longer and climb faster.
Much of mountain biking over the years has also been a road bike up push rather than a downhill bike down on how technology and fitment effects the ride. Beginning mountain bikes were no more than taking road geometry with fatter tires. I can still remember the rigid bike on 1.8 tires days with flat bars and steep geometry. Luckily over time…mountain bikes have really segmented into a real offroad vehicle with travel, slacker geometry and bigger tires to better accommodate trail riding. They still require the same motor though…our legs.
If we did not have that one factor that set us apart from the other offroad disciplines of 2 wheel transportation…our saddle height would default to the same position as the rest of them…low.

Why your saddle should be low and out of the way

There are fundamental reasons why your saddle should be low and out of the way of your body while you ride when you are not climbing. And guess what…it doesn’t all have to do with being able to get your weight back in steep sections which some assume is the only purpose of a dropper post.
Proper Turning on Trails
I am sure you have heard the riders that don’t like dropper posts say it is because they need the saddle to balance/turn the bike. If it is out of the way…they can’t do it correctly. Well guess what? They are doing it wrong. Proper turning on a mountain bike requires the bike to be able to move independently of your body. You need to be able to lean the bike in certain circumstances to corner correctly and smoothly. Whether it be to lean the bike over farther for more grip or get your weight back to rail a berm…you can not do this with your seat up in the optimal climbing position. Just because you are used to riding with it up…that doesn’t make it the correct way to do it.
Weighting and Unweighting the Bike While Riding
Riding smooth and fast on trails is greatly dependent upon how you ride the bike. While you are riding downhill and through flatter fast sections, you should be weighting and unweighting the bike on the trail to smoothen it out, skip small obstacles and keep momentum. To do this, you have to be able to bend your knees and get low on the bike to compress the suspension and then unweight the bike from that sequence. You can not do this correctly if you can not move your body enough to make it happen. This skill is one that I consider probably the most important in riding and it is made much easier/possible with the addition of a dropper post. BMX and motorcross use this technique a lot also.
Ideal Climbing Height Every Time
There are some riders that will just say “I can just put my seat post down for long decents and then raise it at the bottom”. The issue with doing this is that you most likely will not get your saddle to your correct height for optimal climbing. You’ll either get it a little too tall or short and that will effect your efficiency and could cause knee issues. A dropper post will go to the exact height you need with a push of a button and it will be right every time.
It Allows you to get your weight back
The fun one that is everyone’s default answer. Yes…it greatly increases your ability to get your weight back on steep trails for more controlled riding.
Better control on the trail
We do not ride road bikes. We have rocks, roots, down trees…you name it…to contend with. This means that the bike can unexpectantly try to slide out from under us or bounce without notice at speed. With your saddle out of the way, you do not run the risk of an unexpected maneuver of your bike to throw you on the trail or buck you over the handle bars because the saddle will not be giving you a nice push. You need the mountain bike to be nimble enough to overcome unexpected changes in the trail and that is not possible if your movement is restricted.

Common Complaints about Dropper Posts

There are probably even more reasons to come up with on why dropper posts on mountain bikes are a necessity…but now let’s look at the common complaints.
Increased Weight
This is probably the number one complaint I hear from riders that aren’t wanting to put a dropper post on. First, dropper posts have come down in weight tremendously over time. With better materials and advancements in their technology, they can be almost 1/2 the weight they used to be back in the day when our options were really limited. 9point8 actually has one now that only weighs 385 grams including the remote!
The weight is also centered on the bike which makes it less noticeable. XC racers are adopting dropper posts for their benefits so recreational riders really can’t use the complaint excuse anymore. Bike tech has come such a long way.
Reliability of Dropper Posts
I will admit…back in my magnet style Gravity Dropper days…there were some reliability issues. All of the dropper posts I have used in the past couple of years have been trouble free through hard riding. Manufacturers have really figured out how to make the posts a lot more reliable than in the past. It still is a moving part so things can happen but they don’t nearly fail as much as some would like to believe.
Increased Clutter on the Bars
I remember the days of trying to figure out exactly where to put the switch and how it would interact with the other components on the bars. It was really hard to figure out on bikes that had the old school Shimano windows on the shifters. As shifters got to be more low profile, fitment became much easier. Now that the front derailleur has finally died off…it is stupid simple. The switch just took it’s place. No more clutter issues.
I’m just as fast as my friends that have one
First…this is a pretty lame excuse that is filled with an ego trip. We aren’t pro riders where tenths of a second can be measured with a simple component change and not everything is a race. We ride with our friends and our friends have a wide range of abilities and styles. That comment alone makes you sound like an asshole.
That aside…you would be faster with one once you got used to it. Having your seat all the way up your ass the entire ride makes you compensate with inproper technique to overcome the fact that you are not as mobile on the bike as you should be.

The Single Best Advancement in Mountain Bike tech

The dropper seat post is the single best advancement in mountain bike technology. Finally…we have a way to get the seat where it needs to be for all situations outside of climbing and flat pedaling sections. We were the last of the offroad 2 wheeled riders to finally get a way to do this and it has helped the riding of a lot of riders since it has gone mainstream.


If you’ve just gotten into the world of mountain biking, you’re very likely impatient to start developing some of the MTB skills that make the pros the great riders they are. And while it takes anyone a great deal of time to become a great rider, the good news is that you, as a beginner, can start working on some of the skills the pros use daily. Here, we’ll look at some of the skills you can start working on today.

Skill 1: Balance on Uphills, Steep Downhills, and Challenging Trails

You might be surprised that “balance” is on a list of pro skills, because you’ve probably been able to balance on a bike since you took off your training wheels. However, you’ve probably seen pros navigate bumpy, challenging trails like they’re easy. While MTB pros make it look like second nature, maintaining your balance and the balance of the bike is a difficult art to master.
Cecilia Potts, a professional cyclist and former junior mountain biking world champion, explains that riding a mountain bike involves a constant effort to stay upright. She notes that, when riding uphill, you will need to move your body weight somewhat backwards on the bike. This is because too much weight on the front wheel makes it more likely you’ll come off the bike if you hit a bump. In going uphill, you need stop shift forward, or even stand up.
As a beginner, you may need to think about these shifts, but as you practice, you will get to the point where it becomes second nature and you won’t have to think about it anymore.

Skill 2: Stoppies

Stoppies, otherwise known as rolling endos, can make you stand out on a trail, and a well-executed stoppie can impress your friends. Practicing this skill can also help you to become more familiar with your bike. The goal with a stoppie is to pop up the back wheel while the front wheel is still rolling slowly.
To execute a stoppie, crouch down in the pedals and pop up quickly, pressing down on your front brake. Getting the timing and the degree of braking down can take some practice, so be patient with yourself. It’s a good idea to practice on a slight downhill on a trail with good traction.

Skill 3: Manuals

A manual is essentially the reverse of a stoppie: instead of rolling slowly on the front wheel, you want to balance on the back wheel. In order to practice getting the front wheel off the ground, it can be a good idea to first practice a front wheel lift. Practicing getting your front wheel up can help you ride over curbs and other objects.
As will all MTB skills, you probably want to challenge yourself once you’ve mastered one skill. Once you’ve got the front wheel lift, you can move on to a manual. To do this, you’ll need to sink down into the pedals and then pop up with your arms straight out. The goal is to continue rolling on the back wheel. The key is to balance your weight over the back wheel, although this can be very challenging to master.

Skill 4: Switchbacks

If you are planning on riding difficult trails, you’ll probably run into some switchbacks, which are very tight turns that may have you turning almost 180 degrees. Riding switchbacks takes practice, as each rider may find a slightly different flow through them.
One thing that is good to keep in mind on a switchback is keeping your weight low over the bike. Additionally, when going into the turn, it helps to swing your front wheel somewhat wide if possible. As you go around the turn, think about keeping your weight to the bike’s outside. This can help the bike to grip the trail on the turn. Once you become more experienced, you will be able to navigate switchbacks quickly, and even use skills like the stoppie to maneuver through especially tight turns.

Skill 5: Bunnyhop


Knowing how to bunnyhop can help you get over obstacles and to quickly reposition yourself on the trail. There are two types of bunnyhops: the English and the American.
In the English bunnyhop, you get both wheels off the ground simultaneously. To do so, you need to bend knees and elbows to get lower on the bike, then spring upward to get both wheels in the air.
In the American bunnyhop, the beginning is essentially a manual. Then, to get the back wheel off the ground, you think about “scooping” the rear wheel up by bending your knees and bringing the back of the bike up so you land back in the saddle.

Final thoughts

While some of these MTB skills take some work to master, each will help you navigate trails as you advance as a rider. Working on them as a beginner will help you get in enough practice that you’ll be bunnyhopping obstacles and speeding through switchbacks soon.