Saturday, November 25, 2017

Hiking Packs

Pack It In, Pack It Out

On a hike, everything you want or need will be carried with you. If you can get by with a granola bar and bottle of water, then you've got a light load. That camera, tripod, cellphone, bottle of wine, kitchen sink will all add extra weight right on your back. So, everything you leave at home is weight off your back. Those things you do need to bring should be carried as comfortably and easily as possible. Choosing an adequate, well-fitted pack will make your hikes much more enjoyable. There are three general sizes of pack you might consider for your hiking trips. Depending on the size of your group, length of your trip, weather, and extra gear you need for activities, you should choose the smallest size required.
  • Fanny Pack

    Also called waist packs, lumbar packs, or hip packs, these small pouches are intended to carry personal belongings on day hikes. Fanny packs are light and very useful. They have many different features such as built in water bottle holders, compartments for different gear, and loops to hang stuff.
    You can wear a fanny pack around your waist, draped over a shoulder, or by the handle in case you get tired of carrying it any particular way. They are meant to be carried in the small of your back, but I sometimes spin mine around to the front and carry it there when I need to get at stuff while hiking.
    Be aware that overloading a fanny pack may become uncomfortable because it will sag and bounce around. If you have that much stuff, step up to a larger day hiking pack.
  • Day Hiking Pack

    A day hiking pack has shoulder straps but no waist belt. It is intended to carry lighter loads on the shoulders for which you do not need the waist support. There is no sharp line between hiking day packs and back packs - starting with tiny packs, you can find larger and larger and larger packs, some with hydration systems, some with added chest strap, and some with waist strap.
    A day pack is only carried on the shoulders, but since its larger, that's probably the only way you would want to carry it. Your day pack should be big enough to hold all the gear you need, but not much bigger - or you will be tempted to fill it up, meaning more weight and strain on you.
  • Back Pack

    For day hikes, you really shouldn't need a hiking back pack unless you are geared up for cold weather, are going a long distance, or are carrying gear for others. If you are training for an extended trek, then using your backpack whenever you can is a good idea, too.
    Hiking back packs are made for heavy loads so they have complex systems of strapping, padding, and support to make the load as comfortable on your body as possible. Taking the time to adjust your back pack occasionally during a hike will keep things balanced and situated. An off-center pack or a strap rubbing or a hard point in your back can make for an unpleasant hike quickly.
Whichever kind of pack you decide to use, make sure you are able to keep the contents safe from rain. A fanny pack should fit under your rain coat and you should have a cover for your hiking day pack or back pack.
Get a pack based on its features and fit, not on fashion. No one really looks cool wearing a pack anyway, so don't worry about it. But, try to get neutral, earthy colors to lessen your visual impact on the environment.

Hiking Boots

All About Boots

There's a lot involved in figuring out what boot to get and knowing if you made a good choice. We'll start off listing the parts of boots, then various types of boots available, then discuss how to choose one, and finally a few pointers on using and caring for your boots.

Anatomy of a Hiking Boot

Most all footwear has similar components put together to offer protection, support, and style. Some won't have all of these, but these are the main parts to keep in mind when looking at boots:
  • Sole - the bottom of the boot, responsible for gripping the ground, absorbing shock, and protecting from sharp objects. Soles should have deep patterns made of tough rubber so rubber highpoints will grip on hard, slippery surfaces while the entire sole will sink into softer surfaces, increasing the grip there. Soles need to be flexible to allow a natural gait, but also stiff enough to support the foot.
  • Upper - everything above the sole. It's job is to snugly hold the sole to the foot and to protect the foot from scratches, twists, and pounding. It should repel water and allow perspiration to breathe out. The upper should be firmly and permanently attached to the sole - this is called the welt.
  • Inner - Padding and linings are placed inside boots to increase comfort and help with moisture protection. Gore-Tex is a common water liner. Padding also provides insulation and reduces some pressure points. Padding in the toe or heel of your boot is a bad idea because it will quickly compress and change the fit of the boot.
  • Insole - your foot stands on the insole and it should fit to your foot exactly for proper support. Foam insoles will quickly compress and lose support. Insoles with good arch support are important.
  • Tongue - the cover for the opening where you insert your foot. A tongue allows you to adjust the snug fit of the boot.
  • Scree Collar - around your ankle, there needs to be padding that keeps loose dirt, sand, pebbles out of your boot. This should fit snugly and can be helped along by wearing a pair of gaiters.
  • Lacing - laces are used to tighten the fit of the boot. There are many types of eyelets in use:
    • Punched eyelets - usually reinforced with metal grommets, these are holes punched in the upper material. Tend to rip out.
    • Webbing - loops of fabric, tend to wear out.
    • D-rings - metal loops riveted to upper material. Very durable, but tend to cause pressure points.
    • Hooks - open-backed riveted to the upper material. Often used for the top 3 or 4 eyelets.

Types of Boots


There is a wide range of footwear for hiking, ranging from going barefoot to mountaineering boots. The type of boot you require all depends on the type of hiking you are going to do, how much support you want, and how much you can pay - paying more does not necessarily mean getting a better boot. You may be better off with a less expensive, lighter boot for your hiking style. As examples of the general types of footwear, I've just used Merrell. I own a pair of $100 Merrell backpacking boots that fit me extremely well and have given great support for two summers. But, you can find similar styles of boot in higher and lower qualities from the various manufacturers - Asolo, Montrail, Salomon, Timberland, Vasque.
Hiking Sandal - You can safely hike in sandals with sturdy tread and strong straps. A toe guard is a good safety feature to minimize toe stubbing - ouch! Sandals are very light so your legs work less to lift and step, but they have virtually no support for your ankle or foot. They are dry and comfortable for hiking on groomed trails with a light day pack, but not practical for any off-trail hiking or extended treks. It is a good idea to have a pair along on treks to use as a camp shoe and for water crossings.
Find a sandal with molded arch supports, sewn rather than glued straps, comfortable footpad, and tough sole. The pictured style costs around $30, but I got mine on sale for $14.
Hiking Shoe - Shoes provide comfort and easy hiking by using light materials such as nylon and suede enforced with some leather. They are very flexible and require minimum break-in time. You could probably buy a pair and start hiking in them the next day, after just wearing them around for a day. This shoe costs around $50, but there is a huge range in price and quality available. Unfortunately, this style has become popular for normal wear so there are many shoes that appear to be hiking shoes but have no support - check the specs.
Real hiking shoes have good support for your arches and feet. They should also be designed to keep dirt and pebbles from getting in around the ankle and will preferably have some waterproofing. Their lower ankle cut lessens the support of ankles and provides no protection around the ankle area from brush and other scratches. I prefer to have a more sturdy feeling around my ankles when hiking, but these are fine for groomed trails.
The sport of Trail Running is pretty popular and there are specific shoes for trail running that tend to be quite a bit more expensive. They include extra padding, a bit more support, and tougher soles. They cost more, but can be used for normal hiking too.
Mid-weight Boot - This is the boot that most hikers and backpackers will use. They are appropriate for on-trail and off-trail terrain that is not extremely rugged. Typically, mid-weight boots are made of leather or synthetic material with leather enforcement sections like the one pictured. You should expect to spend a week of walking to break in your boots; some require less time, depending on their stiffness. If you are not used to above ankle boots, you'll need to spend extra time getting comfortable to the feel.
No matter what trails you plan to hike, a mid-weight boot will be a good choice. If you decide to go on extended treks, their extra foot stiffness and ankle support will help out. They also work fine on shorter hikes and give you the option to tackle more difficult routes if you want. The boot pictures costs around $80, but my pair of Merrells cost $140 and I got on sale for $95.
Mid-weight hiking boots should be waterproof, probably with a lining of Gore-Tex. If you get an all-leather pair, you may treat it with waterproofing spray or paste. The extra boot weight means you will be working harder with these boots, but the extra safety and support are your rewards.
Heavy Boot - If your lofty plans include boulder hopping and off-trail blazing, then a heavier boot may be in order. These boots bridge the gap between trail hiking and mountaineering and some have features of mountaineering boots, such as crampon lips. Heavy hiking boots offer maximum support against twists and foot injuries, plus being water resistant and breathable through the use of Gore-Tex liners. For general hiking, they are overkill, but for treks over rough trails with lots of elevation change, they may be a good choice. This sample pair runs about $150.
The construction of heavy off-trail boots makes them more sturdy, but also more expensive and not so comfortable. You will need to spend a good amount of time breaking in your new boots and getting your feet used to hiking/climbing in them. They weigh more so you will be working harder for each step you take.
  Mountaineering Boot - Don't even think about getting a pair of these for hiking. :-) Mountaineering boots are intended for climbing mountains and are closer to ski boots than hiking boots. They offer extreme support for feet and ankles with attachment points for crampons for hiking on ice. Usually made with a hard outer shell, inflexible sole, and extra insulation, these boots would kill you on a day-hike. Using these boots, each step is deliberate and calculated - you climb up the mountain, you climb down the mountain. The boot here costs around $275.

Choosing a Boot


When it comes down to choosing a boot, the general considerations you need to make include:
  • Boot Weight - the lighter boot, the less work for your legs. Get as light as you can and still keep the support you need.
  • Water - You want materials that will let perspiration escape but not let water come in. Water in your boot is uncomfortable and causes smelly feet and blisters.
  • Arch Support - keeping your foot comfortable and supported under load is important. If the boot lets your foot flatten out, it will result in a painful hike.
  • Protection from Injury - stubbing your toe and twisting your ankle are the two big ones. Ankle support is more important the rougher the terrain becomes.
  • Load Support - when you carry a load, the boot should protect your foot from bending too far forward or backward while still allowing an adequate range of motion.
From my descriptions of the different hiking boot styles, you probably already know that I would always recommend a mid-weight boot. It is flexible and can be used for easy day hikes and extended backpacking treks. I also recommend taking along a pair of sandals on any multi-day hikes so you can air out your boots and let your feet relax when not actually hiking. This is important for drying out your boots for the next long hike.
For basic day hikes, a hiking shoe would also be a good choice. If you are starting out, a shoe might be a bit more comfortable and you could wear it for every day walking. As long as you are staying on groomed trails that are not too rough, a shoe would be a good bet. But, for myself, I appreciate the ankle support and coverage offered by mid-weight boots so I have the option of stepping up my trail selection if I want.
  • Type of Hiking - consider the terrain you will be walking on, the weather you will encounter, the length of your hikes, and the weight of your pack. A sturdier boot with more support is required for rougher, longer treks with a heavier load. A lighter shoe for groomed trails in arid country would be fine.
  • Skill Level - more support is a good idea for a new hiker. Someone in good hiking shape with legs, ankles, and feet accustomed to the muscle use and pounding may use a lighter boot where a new hiker should have a sturdier boot until he improves his abilities and strength. Think ahead to where you plan to take your skill level. If you are starting on easy, flat trails but plan to work up to more difficult terrain later in the summer or next year, then plan ahead and get appropriate footwear now.
  • Boot Fit - This is the hard part about getting any footwear, as I'm sure you know. Your foot and boot will mold to each other over time, so some tips to getting that fit correct might help:
    • Ignore shoe sizes. If you wear a 9, you may go to 10 or 8 in a hiking boot. Concentrate on the fit of the boot, not the supposed size of it.
    • Wear your exact hiking socks when trying on boots. Use a sock liner if that is what you plan on hiking in.
    • Boots should feel snug all over, but not tight. There should be no points of pressure.
    • Shop for boots in the afternoon or evening. Walk around the mall in your shoes for 10 minutes before trying on the boots. Your feet change in shape through the day and this will help prevent buying boots that seemed to fit.
    • Unfasten the laces and put your foot in the boot. While standing, push your foot forward until your toes reach the toe of the boot. There should be just enough room for you to slip your index finger between your heel and the back of the boot. Check both feet.
    • Move you foot back to the rear of the boot and lace the boots up snugly. Walk around a bit to see how the boots feel.
    • Your toes should not touch the front of the boot. If you kick your toe into the floor, the front of your ankle and top of your foot should take the force - your toes should not hit the toe of the boot. If your toes hit, that means you will be constantly pounding your toes when hiking downhill and it will become painful.
    • Your heel should not slip in the boot. Hold the heel of the boot down with the toe of your other boot and try to lift your heel. If it moves up and down more than a quarter inch or so, then when you hike you run the risk of rubbing a nice big blister on that heel. You may try a smaller size or look for a different style with a different heel cup and arch form.
  • Boot Quality - I'm not really much of a brand-name kind of guy. I also have this suspicion that the sales guy is going to push me to the most expensive boot instead of the best boot for my needs. I've had Nikes that disintegrated and I've had Wal-Mart items that never wear out. But, in general, you pay more for higher quality, I'll go along with that. In the world of hiking boots, there are some major players and they have tough customers. Turn out a poor product and folks will try a different brand the next time around since there are so many to choose from.
    When checking out boots, take some time to examine the boots closely. Some may look really cool, but fall apart after 100 miles of hiking. Some of the particulars to check include:
    • Stitching - look for missed stitches, loose threads, neatness.
    • Welt - where the upper and sole are connected. should be tight and no spots that look weak or loose.
    • Thin Spots - even leather thickness, no abrasions, no cuts or uneven edges.
    • Tread - thick, tough, and solid. not spongy and soft to wear out in a few weeks.
    • Lacing - braided nylon rather than flat shoe laces. Check eyelets for strength and durability.
    • Smell - seriously! I smelled a pair and it was like dead fish. It should have a clean, new leather smell.

Caring For Your Boots


Depending on the materials used in the construction of your boot, you will need to use different products to care for them. Make sure you ask the salesperson or manufacturer for proper care procedures.
  • Break in your new boots. Lighter boots need little break-in, but make sure you wear them around the neighborhood at least a few times, until your feet feel comfortable in them.
  • Store your boots in a cool, dry place. Put crumpled up newspaper in them to absorb moisture. Take them out and wear them every month or so just to keep them soft and in the correct shape.
  • Make sure you have new, strong laces in your boots before starting a hike. Nothing like having a broken lace out there. Just tie a knot and carry on if it does happen.
  • Never dry your boots by a fire or other source of high heat. High heat may destroy glue, ruins leather, and makes you spend more on another pair. Dry them gradually in warm, dry air.
  • After a trip, clean and thoroughly dry your boots. Treat them with the recommended conditioner, usually oil or wax for leather and silicon-based for synthetic materials.
  • Before a trip, coat them again with conditioner and coat the seams to improve water resistance.

Sunday, November 19, 2017

Chafing

Most runners have experienced chafing somewhere on their body. Chafing happens when friction occurs repeatedly, rubbing the skin raw. Some runners notice chafing during their run. Some don’t realize they’ve been chafed until they’re showering afterward, when the mere contact with water on skin creates a painful, burning sensation. There are easy ways to treat chafed spots. Even better, there are ways to prevent chafing altogether.

Chafing happens when friction occurs repeatedly, rubbing the skin raw. Illustration: Oliver Baker

Symptoms of Chafing

  • Discomfort in the form of burning, bleeding or general irritability on the surface of the skin while running or afterward.
  • Burning of the skin anywhere on the body when in the shower after a run.
  • A scabbed-over patch of skin a day or two after chafing has occurred..

Causes of Chafing

Chafing is caused by repetitive friction. Chafing can happen on or around the skin of the armpits, inner thighs, waist, chest, lower leg—anywhere on the body where excessive friction occurs enough to rub the skin raw.
Friction against clothing like an ill-fitting hydration belt or pack, a seam on a pair of shorts that hits you in a bad spot, or even a seemingly harmless shirt can also be the culprit.

Chafing Treatment

If a runner has discovered chafing while on the run, and doesn’t have any lube with them, the best bet is to try to remove the cause of the chafing. Run shirtless if the shirt that’s rubbing the wrong way. If the shorts or tights are causing pain on your skin, try rolling or adjusting the waistband or leg openings to remove the point of friction.
Once the run is complete and all clothing and gear can be removed, clean the affected area with water. Apply an antibiotic ointment. Leave the area uncovered to let air aid in healing the skin, if possible. If the area continues to chafe under clothes, then cover with a loose bandage (make sure to do this after applying an ointment). The area should scab over within a day or two.

Preventing Chafing

Lube of any sort—like BodyGlide or Vaseline (but know that Vaseline can stain your clothes)—is the best form of prevention against chafing. However, no runner wants to lube their entire body before a run. If you know certain parts of your body are prone to chafing, apply lube to that spot before a run, and try to identify and eliminate the cause. For specific chafed spots, try these preventative measures:
  • Mid-thigh skin-on-skin chafing: Wear tights, capris or above-the-knee-length compression shorts to create a wicking, snug-fitting, protective layer between the skin of your thighs. Otherwise, lube up and experiment with different shorts or running skirts (skirts often have compression shorts underneath).
  • Underarm skin-on-skin chafing: Experiment with different shirts, tanks, and sports bras. Try tight-fitting shirts that eliminate friction by staying close to the skin. Experiment with different deodorants/antiperspirants (which may not be the cause of, but could prove to be an irritant to the affected area).
  • Any spot irritated by clothing: Wear sweat-wicking fabrics (avoid cotton) that work to draw moisture away from the skin. Look for materials that feel good against the skin instead of rough fabrics. Make sure that seams on clothing don’t feel irritating when trying it on; that irritation will only increase dramatically on the run. Experiment with different cuts and fits of tops and bottoms to find silhouettes that work with your body type and shape. If it’s the nipples that are experiencing chafing, applying Band-Aids before a race can protect them from any shirt. Or try products like NipGuard, which are made specifically for this purpose.
  • Any spot irritated by a sports bra: Lube up before pulling on your sports bra. Shop for a new sports bra with differently placed shoulder straps, fabrics, and chest straps. Shop for bras with flat seams or seamless construction (but know that seamless bras don’t provide as much support than those with seams).

Saturday, November 11, 2017

Muscle Cramps

Exercise related muscle cramps or spasms all refer to the pain that happens when a muscle contracts and doesn’t release. The feeling can present all over your body. Think of how creaky your calves feel towards the end of a half marathon. Or how your legs have no lift in the last miles of a long race.
image: http://running.competitor.com/files/2017/08/Muscle-Cramp-resized.jpg
Exercise related muscle cramps or spasms all refer to the pain that happens when a muscle contracts and doesn’t release. Illustration: Oliver Baker

Symptoms of Muscles Cramps

Exercise-induced muscle cramps usually hit suddenly and seemingly without warning. You may notice twinges in the affected muscle groups before a full-on cramp begins. The pain tends to be sharp, localized and in specific groups of muscles, like the calf or hamstring. Your muscle may also be hard and contracted under the skin.

Causes of Muscle Cramps

The outdated theory heard by cramped and contorted runners was to eat salt, have a banana and hydrate. That’s because the long-held belief was that dehydration or low electrolytes were the cause of cramping. However, research done by the South African doctor Martin Schwellnus suggests another possible answer. What Schwellnus found was that there was no electrolyte differences between those who cramped and those who didn’t. Additionally, there were features of cramping—for example, the fact that many people relieve it through stretching—that couldn’t be explained by dehydration.
Schwellnus also hypothesized that cramps might be caused by misfiring of the neural signals that tell your muscles to contract. When fatigued, those signals become hyperactive and the muscle won’t relax.
While salt loss and dehydration can certainly cause problems and generalized cramping throughout the body, it hasn’t been shown to cause specialized exercise-induced cramping, such as one would experience in a calf.
One common factor is muscle fatigue, both from sustained activity and holding one position for an extended period of time. As we move our arms and legs, muscles contract and release to make the movement happen. As muscles lose the ability to contract and fire properly, they start to twinge and cramp.
Cramping tends to occur when runners experience exercise fatigue, push harder than usual or are beyond the scope of their fitness and training. While the exact reason may not be clear, there are some things you can do to lessen the incidence of cramping.

Treatment of Muscle Cramps

The good news with muscle cramps is that they only last for a couple of minutes. However, those minutes can feel like hours when a finish line is looming ahead. But with a bit of self-care, you’ll be on your way.
Once a cramp strikes, you really can only do one thing: “Take a deep breath, stop, and stretch,” says Chris Harnish, an assistant professor in the Department of Health and Human Performance at Virginia Commonwealth University. Static stretching has been shown to stop cramps, because it inhibits muscle contraction. Then, start slow and build your speed up.
“If you back off early enough, you can usually prevent it,” says Dr. Gabe Mirkin. Once a cramp comes on, it can be debilitating and impossible to continue, then “the only choice is to back off.”
When muscle groups start to twinge, targeted massage and stretching may cue engaged muscles to relax and release.
Stop doing whatever exercise or move is causing the cramping, even for a quick break. The pause in activity gives muscles the chance to reset.
Hydrate if you’re thirsty. While dehydration isn’t necessarily the cause of acute cramping, it will help lessen the overall strain on your system.
Drink something acidic or salty, like pickle juice. Current tests are showing that the briny flavor may actually trick your brain into releasing cramping muscles. In studies, the engaged muscles actually release before the sodium has time to enter the blood stream.

Preventing Muscle Cramps

Muscle cramps hurt. After experiencing them, you will want to make sure they don’t happen again. Not knowing exactly what causes cramps makes it a challenge to prevent them. However, there are some things you can do to reduce their occurrence.
Train specifically for your race. If your race has a significant amount of uphill or downhill, replicate it in training so your legs and body can adjust to the workload.
Pace yourself. Going out too hard, especially harder than you trained for, will cause your body to fatigue early, putting you at a higher risk for muscle cramps.
“When you are out of shape, and then engage in high intensity, prolonged exercise you would put yourself at risk for developing cramping,” says Schwellnus.
Hydrate and stay on top of electrolytes. While the lack of fluids or electrolytes do not necessarily cause cramps, keeping them in check will help your body feel and function efficiently.

Wednesday, November 8, 2017

Food for Treks

Daily Food


  Pretty much any snacks work to provide energy for a Day Hike since you can eat a healthy breakfast before hiking and a nice dinner when you get home.
Once your hike becomes multi-day, your nutrition needs change greatly. You now need to ensure your body is receiving more than just calories.
A good distribution of foods from the food pyramid, possibly supplemented by a daily vitamin will keep you hiking strong for days, weeks, and even months on end. The calories you consume should be around 15% proteins, 50%-65% carbohydrates, and 20%-35% fats.
Carbohydrates provide faster energy, fat more long-burning, and protein replenishes and keeps muscles healthy over time. Reducing protein too much will be devastating on a long-distance hike.
Carbohydrates and proteins have 4 cal/gram (113 cal/oz), while fats have 9 cal/gram (255 cal/oz). It is a good goal to find calorie-dense foods so fewer pounds are carried for the same amount of energy. A food pack containing about 4.25 cal/g (120 cal/oz) is fairly dense. Most multi-day hikers carry 1.5 to 2.0 pounds of food per day. That means carrying more than about ten days of food becomes impossibly heavy. For longer treks, read about supplying food along the way.
The process to outfit your trekking food is:
  • Estimate how many calories are needed with this Calorie Calculator.
  • Create the meals with this Menu Planner.
  • Shop for food. Start early and buy when items are on sale since they can be stored.
  • Repackage. Just before the trek, repackage food into meals so all ingredients are easy to find.
  • List required utensils. Choose food to minimize the extra tools needed.
The planning of food, shopping for ingredients, and repackaging into meals is an enjoyable part of planning for a long hike. It's exciting to think I will be preparing this meal while the sun is setting on some far mountain.
Figuring out what tastes might work together, making sure I have enough but not too much food, understanding what utensils are needed to make the meal - all parts of the planning that can be a lot of fun.
Some people like real food, such as steak, stew, hamburgers, or other items that take real cooking and weigh a ton. These people tend to take day hikes from a base camp, exploring an area thoroughly.
To take an extended trek requires changing your expectations of food and the effort involved in carrying it and preparing it. Minimizing the weight to carry and the time, fuel, and utensils needed to prepare a meal are the main goals.

Reduce the Weight

It makes no sense to carry any more weight than necessary. Since a large portion of total pack weight can be food, that is a good place to start lightening the load.
There are a number of ways to reduce the weight of your hiking food:
  • Dehydrate - buy your own food dehydrator and dry fruits, vegetables, and meats.   Most inexpensive and healthy option but requires effort at home. A dried apple is still an apple, just without the water.
  • Buy Prepackaged - purchasing freeze-dried or dehydrated meals is the easiest. It is also the most expensive and can introduce large amounts of sodium and preservatives.
  • Calorie Density - read the nutrition labels on foods. Find those that are dense in calories compared to weight. Sunflower kernels are 190 cal/oz while an apple is 15 cal/oz. and a dehydrated apple is 100 cal/oz.
  • Repackage food - you'll be surprised how much garbage labelling you'll throw away. Better to just leave it at home rather than carry it mile after mile just to throw away later.

Other Trek Food Tips


  • Take dehydrated fruits and vegetables to help input vitamins not found in processed foods.
  • Take a daily vitamin each day to help fill any lack of nutrition in your food choices.
  • Pack spices. Take a lightweight container of 5 or 6 common spices to add flavor to meals - salt, cayenne pepper, garlic, cinnamon, chili powder, onion, or whatever you like.
  • If you expect cold mornings, or aren't eager to start hiking bright and early, have oatmeal and hot chocolate. On long treks, I prefer packing up and moving right away with a break for Pop-tart, granola bar, or trail mix after an hour or so. This saves a lot of time heating water and clean up. It also means less fuel to carry.
  • The ultimate lightweight meal packaging is to just take your credit card. When thru-hiking a long trail that goes through towns, it's a lot lighter to eat at a restaurant or buy fresh food at a grocery store than to carry your meals.

Monday, November 6, 2017

Plan the Hike, Hike the Plan

  I actually enjoy the planning of hiking trips and treks nearly as much as the hike itself. Thinking about where I'll go, what I'll eat, the supplies I'll need, and what I'll see helps get through boring stretches at work and commuting. Planning is kind of like virtually taking the hike and its fun to see how close I imagined it would be to how it really is.
When planning a hiking trip, you can't get too detailed. It's fine to calculate right down to the weight of your bandanna or the exact minute you need to stop for lunch. But, you do need to remain flexible at all times and be prepared to shift your plans as needed.
These main planning sections are good things to consider.

Take a Shot


Consider your current abilities from your recent training to determine how much of a hike you can handle - be realistic. Decide where you want to go - the coast, mountains, nearby forest, ... wherever you want to explore. Get a rough idea of how many hours you want to hike, how far you can go, what hiking supply load you need, and then use maps and guidebooks to find a trail that matches your desires and abilities. Figuring out how far you can hike in a certain amount of time is a good exercise. Or, figuring how long it will take to hike a certain trail. The actual results will depend on your shape, the trail condition, elevation, weather, and lots of other little things. But, in general, you can count on 2 miles per hour on flat land. Reduce that a bit for every 1000 feet above your home elevation due to reduced oxygen. To the total time, add 1/2 hour for every 1000 foot elevation change due to slow climbing.
Here's a simple calculator that will give you a crude estimate - enter what you want and the rest will be calculated:

Hiking Goals
Ability:Beginner     Average     Advanced
Hike Elevation:feet above home
Elevation Change:feet
Distance:miles
Time:hours

by HikingDude.com
Click Here to use Calculator on your Site!

Tell a Friend


  Find a hiking buddy to go with you. Hiking alone is not safe. Once you are an old pro and have been through some rough weather, difficult terrain, a few accidents and missed turns, then you can think of hiking alone. Until then, take a buddy along. Someone with more experience than you will be a great way to learn new tips. Discuss your plans with your friend and make sure everyone understands how far you want to go, how fast you want to hike, and what you want to see on the hiking trip. Having expectations synchronized will make the adventure fun and fair with fewer surprises.

Check Terrain


  Use a detailed topographic map to understand the difficulty of your hike. It may just be a 6 mile loop on the map, but that may be flat or include 4000 feet of elevation change.
Learn how to read a map before going hiking. When you are in the field, your map and compass will be your most important tools to stay on track. Also make sure your map is current - trails change, magnetic declination changes, areas open and close.
Checking with the agency responsible for managing your planned hike area is a good idea.   The elevation you gain and lose while hiking will have a definite effect on how fast you hike and how much ground you cover. Hiking up a steep grade will slow you way down, forcing your muscles to work much harder. Hiking a downgrade will be easier on muscles but much harder on joints.
 
  Creating a hike elevation profile will give you a good idea on where the more difficult stretches are in your planned hike. Convert the information on your topographic map into a chart of elevation versus distance. In this example, a climb to the top of a peak and then the return on the same trail is diagrammed. It is fairly consistent with just one short stretch halfway up that is fairly flat.
Take into account the time of year when checking the terrain. A dry, dusty trail in July may be a muddy mess in May. You may be able to hike across a frozen marsh in January, but go around it in June. Also remember that higher altitude means cooler temperatures and hypothermia is a real possibility anywhere below 60F degrees. If your hike takes you over 9000 feet, read more about high altitude hiking.

Check Weather


  Everyone knows that weathermen are seldom correct. Even with high-tech gear, predicting the chaotic nature of weather is not possible. A beautiful, sunny day can turn to life-threatening rain in an hour. You have to be prepared for the worst probable weather and its consequences. The word 'probable' is key - June in Minnesota will not require snowgear, but will require raingear. You need to consider what the worst effects will be from weather for which you did not prepare and then decide if it is worth the risk. For example, hiking in Death Valley in April has a miniscule chance for any precipitation, but an average daily high of 90F and a record of 120F. So, the consequences of no raingear are much less than not taking a hat and lots of water. Elevation and weather are closely related. In general, every 1000 feet in elevation means a drop of 5F degrees in air temperature. Also, the higher you go the faster and more severe weather changes with big drops in temperature occurring quickly and higher winds in general.
A sudden rain passing through may just cause you to seek shelter for 15 minutes. But, your travel time may be greatly reduced afterwards due to a deep layer of mud on the trail. Be ready to change your hike plans due to weather conditions. Read more about what to do in case of lightning.
While hiking on your trip, constantly stay in touch with nature around you. Just walking through and oohing and aaahing over the flowers and mountains is missing half the fun. Check out the clouds - are they building? are they picking up speed? are they white or dark? what does the horizon look like? Are birds still flying around? Is there a gentle breeze in the treetops or is the wind getting stronger? Keeping an eye on your surroundings is fun and important.

Check on Permits


hiking trip 
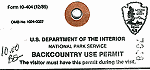
Most national parks and wilderness areas require a backcountry permit. Often times these permits are free but if you are checked and have no permit, the fines can be very expensive. Permits are used to monitor visitor traffic, to limit use of certain spots, or to help keep hikers safe. From very restrictive permits that define your trails and campsites to general access permits, it depends on the management goals of the agency in charge. Other areas may not require a permit, but its always a good idea to check in with a ranger. It's an opportunity to tell one more person where you plan on hiking and to check one last time on trail conditions and any special short-term regulations in the area.

Tell Another Friend


 Always, that is ALWAYS, leave your hike itinerary with someone at home.
Make sure they know your route, start time, when you will be back, and when you will be contacting them. If you are not in contact with them as expected, they should have instructions on who to call to check - for example, the ranger station near the trailhead.

Saturday, November 4, 2017

Runner’s Knee

Patellofemoral pain syndrome (PFPS) is among the most common causes of knee pain. The injury impacts top runners and amateurs alike. In fact, there is evidence to suggest it may account for as much as 50 percent of lower extremity injuries in runners. PFPS is generally characterized by pain and discomfort behind or around the patella. It is often called runner’s knee because pain results from activities that require the knee to flex while bearing weight on the patellofemoral joint, such as running. If you’ve encountered this injury, you know how nagging it can be. Fortunately, there are a number of research-backed measures you can take to treat or prevent PFPS.

Symptoms of Runner’s Knee
  • Tenderness around or behind your knee cap
  • Pain that is aggravated by downhill running
  • Dull pain when running on uneven terrain
  • Pain when you push on the patella

Causes of Runner’s Knee

Runner’s knee occurs as a result of improper tracking of the knee cap in the femoral groove. When the patella doesn’t track correctly, the result is pain while flexing the leg and bending the knee. Poor strength and flexibility in areas like the hips, hamstrings and quadriceps have all been shown to contribute to this problem.
Training errors are another potential culprit. This can include an accelerated build-up of mileage, as well as too much high-intensity running or hill work. Worn out or inappropriate footwear is also cited as a possible cause.

Runner’s Knee Treatment

The first line of treatment for runner’s knee is rest, along with the use of ice and NSAIDs. This may help diminish pain and swelling in the short term.
Take a day or two to rest. Do not run on a knee that is painful, as you will only make things worse. If you are unable to bear weight on the injured leg or if you have swelling of the joint, these are signs that you may have more important structural damage to the ligaments or cartilage. In these cases, evaluation by a physician is strongly recommended.
For long term care, research suggests strengthening the top of your leg if you’re struggling with runner’s knee. Poor hip strength and stability have been repeatedly shown to create knee problems. For instance, when researchers focused on a group of runners with PFPS, they found that their biomechanics were hampered by hip instability as a result of weak hip abductor muscles. Other research identifies the importance of hamstring and quadriceps strength in addressing runner’s knee.
Research published in the Journal of Athletic Training demonstrates that six weeks of hip strengthening exercises can help improve the symptoms associated with runner’s knee. Squats, balance exercises and movements that incorporate the hip abductors and hip flexors are paramount.
What’s more, when physical therapy researchers from the University of Pittsburgh compared patients with and without PFPS, they discovered that those with runner’s knee tended to have less flexibility in their quadriceps, hamstrings and calves. Some runners will find relief by foam rolling. Rolling out the quads, hamstrings and calf muscles can help stretch those areas and take strain off the knee.
There is also new research out of the University of Calgary that suggests orthotic insoles may help runner’s ailing from PFPS. They discovered that orthotics could change biomechanics by reducing knee loading and thereby alleviating pain. The researchers suggest that custom-made insoles, which can be tailored to a runner’s individual gait pattern, are optimal.
Remember that cutting back on mileage—or even taking a complete break from running—remains important. If pain has subsided after a few days of rest, begin a strengthening program for your legs. Replace your shoes if necessary with new ones that are suited to your running style. After a week or so, continue the strengthening exercises and resume running on a soft surface but at a much reduced volume and intensity. If the pain does not return, slowly increase the frequency, duration and finally intensity of the runs over a period of at least a month. If at any time the pain returns, evaluation by a physician is probably a good idea.

Preventing Runner’s Knee

It is important to be proactive with prevention measures, especially if you’ve suffered from runner’s knee in the past. Implementing a regular strength and flexibility routine should be a main focus. Strengthening the hips, quads, hamstrings and every muscle in between improves overall stability and helps the kinetic chain function by design. In addition to improving patellar tracking, these exercises will reduce undue pressure and load on the knees.
Working to improve mobility also remains necessary. Leg swings before or after workouts are a great way to improve hip mobility in particular. Simply stand next to something that you can hold onto for balance and swing one leg at a time forward and backward. Then swing each leg sideways, sweeping it across the front of your body. Foam rolling the iliotibial band, hamstrings, calves and quads can also assist in keeping your biomechanics in good working order.
Listen to your body and respond at the first sign of discomfort. Runner’s knee is an injury that worsens if you continue to run on it. Building mileage slowly will help ensure you remain healthy. Do not increase your mileage by more than 10 percent from one week to the next. Avoiding excessive downhill running and stairs are also good measures to take if you’re hoping to skirt injury.
New research has found that addressing running form can help to prevent runner’s knee. Converting from a rear-foot to a forefoot or mid-foot strike pattern has been promoted as a means to reduce patellofemoral stress. Adopting a forward trunk posture, meaning a mild lean, while you run, while simultaneously engaging lower abdominals subtly, can also help.


The Great Bike Debate: 26-inch-wheels vs 29er

If you want to stir a lively debate among cyclists, simply ask which is better: 26 inches or 29er? Many mountain bikers will extol the virtues of one wheel size over another, but what benefits do larger wheels offer commuters?
700c vs. 29 inches
Many commuters have been rolling to work on 29-inch-wheels for years.  All road and cyclocross bikes are built with 700c wheels, which are 29 inches. However, 700c wheels are designed to accommodate a thinner tire. Many come in widths ranging from 18 to 23 millimeters, with touring tires ranging from 25 to 28 millimeters. Wider tires offer a plusher and smoother ride, but the additional rolling resistance results in slower speeds. On the flipside, the wheels on a 29er are beefier and were originally designed for off-road use. The tires are designed to roll over obstacles, while making more contact with the ground. Mountain bike tires are much thicker than a 700c, with widths typically falling between 1.8 to 2.4 inches.
The 29er
A 29er is more than just a wheel size. The bike’s overall design and geometry varies as well. Because of the larger wheels, the bike tends to accommodate taller riders and these frames offer greater ground clearance for a rider to navigate obstacles. The bikes also have a varied geometry and will handle differently than a 26-inch mountain bike or a 700c road, touring or cyclocross bike.
Big-wheel advantages
Companies such as Surly have caught on to the 29er craze, offering bikes, such as the Karate Monkey, that are designed for commuters and fixed-gear trail riding. For bicycle commuters, 29-inch-wheels help dampen bumpy roads and potholes, are often a more comfortable option for larger rides, and they tend to carry a rider’s momentum better than a 26-inch-wheel. These larger wheels also make it easier to roll over soft surfaces. A fatter tire increases the bike’s traction and corning ability, making it a more stable ride, especially in inclement weather or on gravel and dirt paths.
Other considerations
Any thicker tire will carry a speed disadvantage and a larger wheel will also increase the bike’s weight. While 29ers help carry a rider’s momentum, they’re slower to accelerate and brake.
Bicycle Trailers and 29ers
Many bicycle trailers will fit bicycle’s with 29 inch wheels, but always ensure that if they attach via rear axle, they will accommodate the wheel size of the bicycle.  For more on bicycle trailers download our FREE ‘Bicycle Trailer & Cargo Carrier Buyers Guide‘.