Best mountain bike knee pads
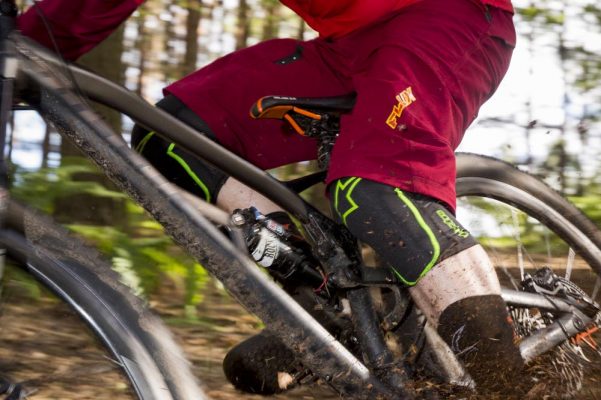
What to look for in the best mountain bike knee pads. Hard or
soft? Pull-on or wrap-on? Which brands make the best? Why wear knee pads
at all?
We’ll start straight in with the reviews and then follow up with our conclusions and finish this guide off with some general knee pad buying advice…

Read the full review of the Dainese Trail Skins 2 knee pads

Read the full review of Specialized Atlas knee pads

Read the full review of Ion K-Lite Zip-off knee pads

Read the full review of the Race face Ambush knee pads

Read the full review of the Troy Lee Designs KG5400 knee pads
If you’re after the bare minimum then we’d recommend a knee warmer style pad like the Ion K_Sleeve. This design is so comfy that it doesn’t feel like you’re wearing a kneepad at all and both are great in the winter because they offer extra warmth and can be peeled of after a muddy ride, taking all the clag with them. The downside of these ultra light kneepads is the lack of padding – these kneepads will protect from gravel rash but that’s about it.
If you want to go to the other end of the scale then the Leatt Airflx Pro offer the most protection. Again the trade off is they are the least comfortable. Most of this is down to the flexibility of the pad – if it doesn’t move with you it can chafe the ligaments at the back of the knee but conversely if it moves too much, it can also result in some soreness. The best pads are the ones that are snug at the top and bottom seams, with firmness rather than constriction at the back of the knee. A good kneepad also needs to form to the shape of your knee, where it can stay centred and be more effective if you crash. Some manufacturers actually place silicone gripper inside the knee to stop knee cap movement but we’re not convinced this is a good idea because silicone rubbing on your skin is more abrasive than plain Lycra.
Pads with a high comfort level and good stability include the 7idp Transition, G-Form Pro-X, TSG Joint Knee Sleeve and the Troy Lee Designs Speed Knee Sleeve. They’re all slightly different takes on the lightweight design but it was oly a couple of little details that stopped them from taking top honours. The Troy Lee and 7idp were both a little too warm, the G-Form lacked a little bit of lateral protection and the lack of sizes and price did for the TSG. The Troy Lee and G-Form pads both get smart materials and are more affordable than the TSG.
It was also the price, or lack of it in this case, that earned the Alpine Stars Paragon top marks. It wasn’t the most comfortable kneepad here.
Back in the early days of mountain biking the only protection seen on normal riders was a helmet – sometimes riders didn’t even bother with them! Nowadays knee pads are no longer an unusual sight on trail riders. Indeed, it’s becoming odd to see riders not wearing knee pads.

Firstly, riders are generally riding more technical trails than they used to and/or riding trails faster than they used to. Thus the frequency and consequences of coming off are higher.
The other reason is that modern knee pads are not uncomfortable to wear. Much like improvements in helmets, knee pads are lighter, more airy and less chafe-prone than pads of old.
Of course, you don’t have to wear knee pads. It’s entirely up to you. We’d recommend wearing them on every ride and just getting used to them and having it become second nature. You can never predict on what rides you’ll crash. Indeed, it’s often the casual local loops that see the worst crashes!
As well as protecting you from more serious injuries, knee pads main time is spent preventing your knees from the common scrapes and cuts you get from mountain biking. They also help to keep you a bit warmer in colder and wetter weather.
There are also some knee pads that are both soft AND hard at the same time. These use ‘magic’ forms of material that are pliable and soft until they receive an impact, at which point they stiffen up and go hard. Pads with this sort of stuff in them can be more expensive and they aren’t as breathable as regular soft pads but they can be very comfy to wear and, well, they’re pretty trick.
Soft pads may seem a bit of an odd or risky choice. And although technically not as protective as a hard plastic cup, they do protect you from the vast majority of crash damage (cuts, scrapes, mild bruising).
Soft pads are typically more comfortable and less sweaty to wear than hard pads, which is actually a very good point to note. If you’re more likely to wear the pads in the first place because they’re comfy then that is inherently safe than owning a set of hard pads that you never actually wear because they’re too sweaty and stiff.

The more common variety is pull-on knee pads. As it says, you pull them on over your foot and up into place. These can be awkward to do if you’ve already got your riding shoes on (a handy hint here is to pull them on with the front at the rear; that way is passes over your heel easier).
Wrap-on pads can be removed or put on without having to remove your shoes. They’re a bit more user-friendly and the idea is that you can put the pads on as-and-when required ie. you can remove them when you know you have an extended bit of fireroad climbing or tarmac bashing to do.
Sizing is a key issue with knee pads. It’s good idea to check out the product listing details for leg opening sizing info – or visit the manufacturer’s website for info if it’s not listed on the retail shop’s page.
 We’ve all been there – you’re bombing down a piece of rocky
singletrack and suddenly you’re in slow-mo, arcing gracefully over the
bars followed by the inevitable crunch of body on the trail. Spectacular
crashes
happen but often it’s just a small tumble and a bit of gravel rash or a
cut which can really put the mockers on a ride. To stop this drama
becoming a crisis, lightweight kneepads are the perfect solution.
We’ve all been there – you’re bombing down a piece of rocky
singletrack and suddenly you’re in slow-mo, arcing gracefully over the
bars followed by the inevitable crunch of body on the trail. Spectacular
crashes
happen but often it’s just a small tumble and a bit of gravel rash or a
cut which can really put the mockers on a ride. To stop this drama
becoming a crisis, lightweight kneepads are the perfect solution.
Most usually have semi-flexible or mouldable kneecap mounted to a Lycra body with mesh panelling at the back for breathability and a large cut away or stretchy material to reduce chaffing when pedalling for long periods. Obviously a lightweight kneepad won’t stop really big impacts and they’re definitely no substitute for proper armour if you’re riding downhill or have paid for an uplift but they are great for general trail riding. They’re so comfortable and well fitted that you often don’t know you have them on.
Lightweight kneepads are also popular with enduro racers because they allow freedom of movement when pedalling but with just enough protection should you fall on the highly demanding technical courses. Due to their minimal construction lightweight kneepads are also relatively cheap, so there’s not really any excuse to get protected.


We’ll start straight in with the reviews and then follow up with our conclusions and finish this guide off with some general knee pad buying advice…
Our current pick of the best mountain bike knee pads
Alpinestars Paragon
Although mid-weight, the Paragon offers heavy-duty protection, and we actually put this to the test going down hard on loose gravel on one of the test rides. This scuffed a hole in the face fabric but we walked away without a scratch. With its contoured shape the Paragon has the best fit of any on test, there’s absolutely no folding or pad movement at the knee, even when pedalling hard. The mesh back panel offers good breathability and, while the seams are flat and inward facing, we did experience a little bit of uncomfortable bunching of the material at the back of the leg. Elastic at the bottom hem and silicone at the top, plus a couple of strips inside, stop the Paragon shifting out of wack. Overall this is a solid kneepad, available in a ton of sizes, what gets it our ‘best on test’ award is the price.G-Form Pro-X
A lot of companies make G-Form knock offs but it was the first with this lightweight design and the Pro-X is second-generation pad with much meatier padding and the company’s new RPT (rate-dependent technology), self-hardening smart material. The pad on the MkII is shaped to fit better but there’s still a little bit of bunch on the sides of the pad. To save weight the sleeve is gets a Lycra face fabric with a technical mesh back panel to enhance breathability and moisture wicking. The Pro-X is available in six sizes, although the large tested did feel a too tight at the calf. And the silicone gripper on the top edge also pulled on the skin, leaving a red mark. The Pro-X is super lightweight, has a good level of protection and unlike other pads using smart materials is also machine washable, which is good because dirt does collect in all the channels.Ion K-Sleeve
This is a long knee warmer style pad that you can literally tuck underneath you liner shorts to keep it in place. It is the longest pad we’ve ever tested but it’s also one of the lightest. Protection comes from high-density memory foam insert that extends across the top and down the sides. You can’t see it but this is actually stamped in a hex pattern allowing it to mould easier to the knee. The K_Sleeve is also side specific and Ion does the smart thing and writes this on the outside of the pad, so you don’t have to rummage about looking for the info on the label. To increase wicking there’s a super breathable mesh back panel, which is also none chafing and, if you do sweat buckets, it also gets an anti-odour treatment. Like the Race Face Charge tested elsewhere, the K_Sleeve only offers minimal protection but is super comfy and prefect as winter leg wear.Leatt Airflex Pro
We tested Leatt’s original ultra slim AirFlex knee guard two years ago and it felt flimsy and didn’t fit snug. The Pro is much more meaty and now features additional side and upper knee impact protection. To increase airflow the centre kneecap is perforated and it’s built onto a sleeve made from Leatt’s new highly vented and breathable MoistureCool and AirMesh fabrics. Both are antimicrobial and so far have been pretty hardwearing. The Pro does bunch up where the side pads come together and, like all open designs, it does fill with dirt. However, the cap material is hardwearing, offers plenty of protection, even for gravity riding, and it’s doesn’t move due to printed silicon inside the cup and comfy grippers top and bottom. Just so you know what knee goes in what pad Leatt even writes left and right on the outside.Six Six One Recon
With its lightweight sleeve with a waffle style protector, the Recon is a lot like the G-Form Pro-X. It even uses a smart urethane protector using the branded XRD Technology. Like the D3O, the idea is that it forms to your body shape in normal riding conditions but then freezes under impact. Fit round the back is great with a stretch mesh panel and an elastic strap over the calf. 661 also goes easy on the gripper, using a minimal strip on the inside of the elastic hems. A unique feature of the Recon is the Padlock connection, a simple press-stud system that lets you attach the kneepad to 661’s Evo Short to keep it in place. The Recon is less substantial than the TSG and G-form kneepads and does bunch up a bit at the sides but it is more affordable and is lighter.TSG Joint Knee Sleeve
The TSG Joint Knee Sleeve also features a waffle style PU foam pad. It’s not made from clever compared to G-form’s self-hardening smart material but it has a bit more meat to it and is supplemented via extra side pads. With the built in articulation it’s properly form fitting and moulds easily to the shape of your knee when bent. To save weight and to reduce irritation of the tendons on the back of the knee, TSG runs a flexible Lycra sleeve with vented mesh back complete with a cut-out. The Lycra material is sporting a few nicks in places but it’s quick drying, which is great because unlike most pads with D30 or similar, the TSG pad is machine washable. For a lightweight waffle pad the Joint offers a high level of protection, it’s also stays there due to some terry material directly over the patella area. Left and right specific, what stops it getting top marks is the lack of sizes and price.Troy Lee Designs Speed Knee
Troy Lee makes a massive range of protection with the Speed Knee Sleeve being the lightest and least protective but it’s easily one of the most comfortable in the range. This is due to its 360degree seamless construction; which is sort of like an oversized sock. The only issue we had with the sleeve is the material is a little thick, there’s no mesh, so the pad runs hotter than most. Protection is via a 4mm D3O insert. In its inert state this smart material is soft and malleable but hit the deck and it stiffness significantly. It offers a decent level of impact protection and gets an abrasion-resistant cover but it’s not machine washable. The Speed Knee is really comfortable, even on long all day rides, but it’s a little short in length, the silicone gripper on the upper seam is a little too tight and the pad bunches a bit on the outside edge.7iDP Transition mountain bike knee pads
The Transition has a light construction consisting of a thin Lycra sock with full-length ventilated panels, held in place by silicon gripper strips at both the top and bottom. The pad itself is heat-moldable foam and feels thicker and protective. It took slightly longer to conform to the knee when on, but once it’s shaped itself to the knee it proved super comfortable and I had no problems wearing the Transition on big rides. The Lycra sleeve goes quite a long way up your thigh, which can be useful for eliminating chilly breezes but it can also overlap with undershorts if they’re particularly long. In use the thin construction makes for good ventilation – only the area behind the pad gets sweaty on hot days. Without any extra straps to fine-tune the fit, correct sizing is important but the medium size tested felt snug and the pad didn’t move once on. It also never felt constrictive or uncomfortable.Sweet Protection Bearsuit mountain bike knee pads
The Bearsuit is pretty much as basic a kneepad as you could design. It is essentially a perforated, stretchy tube that has a gripper strip along the top edge and a Sas-Tec pad over the kneecap for protection. No straps, no webbing: as I said simple. As such it pays to make sure it fits well around the thigh or you’ll forever be pulling it up. Thankfully the size medium fitted me well and I had no such issues – the Bearsuit staying firmly put over some seriously long days in the saddle. Sas-Tec is a Viscoelastic foam that moulds around the knee with your body heat. As kneepads go the level of protection is fairly light but suits the ride-all-day nature of the pad well and should be sufficient in all but the nastiest of crashes. A lighter stretch panel at the back of the knee stops bunching and adds a little extra ventilation but it still feels a little warm in hot weather. It doesn’t stop the Bearsuit from being a great lightweight option for trail riders though and, after a few months of regular use, it’s showing no signs of wear
Dainese Trail Skins 2 mountain bike knee pads
All the tweaks and improvements do add £20 (compared to the old trail Skins) to the price but the Trail Skin 2 is still very good value because it such great quality. It’s also comfortable, breathable and has the right level of on-trail protection for risk takers and the accident-prone.Read the full review of the Dainese Trail Skins 2 knee pads
Specialized Atlas mountain bike knee pads
The Atlas pads make wearing kneepads just that little bit easier for general trail riding, being both light and comfortable. Whilst they certainly do not offer the protection of more substantial kneepads they help limit the damage from the inevitable. The price is possibly a tenner higher than some comparable products, but you’ll use these pads again and again and again.Read the full review of Specialized Atlas knee pads
Ion K-Lite Zip-off mountain bike knee pads
Part of a new breed of easy-to-remove kneepads, Ion’s K-Lite Zip is lightweight and relatively slim-line, but still packs loads of protection. On top of a hard shell cup (to better distribute any crash forces), Ion uses an impact-hardening German polymer called SAS-TEC.Read the full review of Ion K-Lite Zip-off knee pads
Race Face Ambush mountain bike knee pads
Comfort is excellent — once the Ambush pads are on, you soon forget you’re wearing them and the terry-towelling lining capably mops up sweat and keeps you cool in hot weather. The Race Faces are a little bit heavier than some guards with DH levels of protection, but also extremely comfortable to hike, pedal or climb in, even for extended periods.Read the full review of the Race face Ambush knee pads
Troy Lee Designs KG5400 Shock Doctor mountain bike knee pads
Troy Lee Designs KG5400 Shock Doctor mountain bike knee pads
There’s a good reason why you’ll see these puppies in this magazine so often — our staff repeatedly choose them above all others, and after completing thousands of trail miles, they still look decent, have held their shape and are working perfectly.Read the full review of the Troy Lee Designs KG5400 knee pads
The best mountain bike knee pads
Kneepads didn’t used to be a common sight on the trails because we didn’t have the level of technicality we do now and most of the DH/gravity kneepads on offer we really uncomfortable if you had to pedal in them for any length of time. Now-a-days most trail riders can be seen sporting some form or armour and that’s because most of the lightweight kneepads can easily we worn all day in comfort but will still save you if things go pear shaped.If you’re after the bare minimum then we’d recommend a knee warmer style pad like the Ion K_Sleeve. This design is so comfy that it doesn’t feel like you’re wearing a kneepad at all and both are great in the winter because they offer extra warmth and can be peeled of after a muddy ride, taking all the clag with them. The downside of these ultra light kneepads is the lack of padding – these kneepads will protect from gravel rash but that’s about it.
If you want to go to the other end of the scale then the Leatt Airflx Pro offer the most protection. Again the trade off is they are the least comfortable. Most of this is down to the flexibility of the pad – if it doesn’t move with you it can chafe the ligaments at the back of the knee but conversely if it moves too much, it can also result in some soreness. The best pads are the ones that are snug at the top and bottom seams, with firmness rather than constriction at the back of the knee. A good kneepad also needs to form to the shape of your knee, where it can stay centred and be more effective if you crash. Some manufacturers actually place silicone gripper inside the knee to stop knee cap movement but we’re not convinced this is a good idea because silicone rubbing on your skin is more abrasive than plain Lycra.
Pads with a high comfort level and good stability include the 7idp Transition, G-Form Pro-X, TSG Joint Knee Sleeve and the Troy Lee Designs Speed Knee Sleeve. They’re all slightly different takes on the lightweight design but it was oly a couple of little details that stopped them from taking top honours. The Troy Lee and 7idp were both a little too warm, the G-Form lacked a little bit of lateral protection and the lack of sizes and price did for the TSG. The Troy Lee and G-Form pads both get smart materials and are more affordable than the TSG.
It was also the price, or lack of it in this case, that earned the Alpine Stars Paragon top marks. It wasn’t the most comfortable kneepad here.
Knee pads are the new helmets
What we mean by this is that it’s now standard to wear knee pads just like it is standard to wear a helmet.Back in the early days of mountain biking the only protection seen on normal riders was a helmet – sometimes riders didn’t even bother with them! Nowadays knee pads are no longer an unusual sight on trail riders. Indeed, it’s becoming odd to see riders not wearing knee pads.
Mountain bike knee pads: why wear knee pads?
Why has it become standard? Partly this is due to two things.Firstly, riders are generally riding more technical trails than they used to and/or riding trails faster than they used to. Thus the frequency and consequences of coming off are higher.
The other reason is that modern knee pads are not uncomfortable to wear. Much like improvements in helmets, knee pads are lighter, more airy and less chafe-prone than pads of old.
Of course, you don’t have to wear knee pads. It’s entirely up to you. We’d recommend wearing them on every ride and just getting used to them and having it become second nature. You can never predict on what rides you’ll crash. Indeed, it’s often the casual local loops that see the worst crashes!
As well as protecting you from more serious injuries, knee pads main time is spent preventing your knees from the common scrapes and cuts you get from mountain biking. They also help to keep you a bit warmer in colder and wetter weather.
Mountain bike knee pads: what to look for
Knee pads don’t vary a great deal in general design or concept. Most pads are a tube of fabric with a hole in the back of the knee, some sort of pad or plastic at the front and a Velcro strap at the top and bottom cuffs.Hard or soft mountain bike knee pads?
The biggest variation in them is whether they’re soft or hard. Hard pads have a rigid bit of plastic cupping around the knee. Although these can be bulkier and less breathable some riders do find that they stay in place better than softer pads.There are also some knee pads that are both soft AND hard at the same time. These use ‘magic’ forms of material that are pliable and soft until they receive an impact, at which point they stiffen up and go hard. Pads with this sort of stuff in them can be more expensive and they aren’t as breathable as regular soft pads but they can be very comfy to wear and, well, they’re pretty trick.
Soft pads may seem a bit of an odd or risky choice. And although technically not as protective as a hard plastic cup, they do protect you from the vast majority of crash damage (cuts, scrapes, mild bruising).
Soft pads are typically more comfortable and less sweaty to wear than hard pads, which is actually a very good point to note. If you’re more likely to wear the pads in the first place because they’re comfy then that is inherently safe than owning a set of hard pads that you never actually wear because they’re too sweaty and stiff.
Pull-on or wrap-on mountain bike knee pads?
The other aspect that varies is how you put on or remove the pads. Pull-on or wrap-on are the options.The more common variety is pull-on knee pads. As it says, you pull them on over your foot and up into place. These can be awkward to do if you’ve already got your riding shoes on (a handy hint here is to pull them on with the front at the rear; that way is passes over your heel easier).
Wrap-on pads can be removed or put on without having to remove your shoes. They’re a bit more user-friendly and the idea is that you can put the pads on as-and-when required ie. you can remove them when you know you have an extended bit of fireroad climbing or tarmac bashing to do.
Sizing is a key issue with knee pads. It’s good idea to check out the product listing details for leg opening sizing info – or visit the manufacturer’s website for info if it’s not listed on the retail shop’s page.
We’ve all been there – you’re bombing down a piece of rocky
singletrack and suddenly you’re in slow-mo, arcing gracefully over the
bars followed by the inevitable crunch of body on the trail. Spectacular
crashes
happen but often it’s just a small tumble and a bit of gravel rash or a
cut which can really put the mockers on a ride. To stop this drama
becoming a crisis, lightweight kneepads are the perfect solution.Most usually have semi-flexible or mouldable kneecap mounted to a Lycra body with mesh panelling at the back for breathability and a large cut away or stretchy material to reduce chaffing when pedalling for long periods. Obviously a lightweight kneepad won’t stop really big impacts and they’re definitely no substitute for proper armour if you’re riding downhill or have paid for an uplift but they are great for general trail riding. They’re so comfortable and well fitted that you often don’t know you have them on.
Lightweight kneepads are also popular with enduro racers because they allow freedom of movement when pedalling but with just enough protection should you fall on the highly demanding technical courses. Due to their minimal construction lightweight kneepads are also relatively cheap, so there’s not really any excuse to get protected.
Used and Abused: How we test
One of the reasons for choosing a lightweight kneepad is because you want comfort while pedalling. To put these to the test we minimum ride time was two hours with each of the kneepads simply because it usually takes that long for any rubbing or chafing to become apparent. Also the silicone gripper, designed to hold the kneepads in place, only starts to irritate the skin once it’s sweaty. By accident rather than design we even crashed hard using a few of these pads, testing the effectiveness of the pad and it’s ability to stay in place.
Pad
Most lightweight kneepads use a soft kneecap or pad made from memory foam or EVA (ethylene vinyl acetate). This is flexible and often shaped or articulated to fit better round the knee. Some kneepads use D30, a self-hardening polymer that stiffens during a high-speed impact.Side pads
Ideally the central pad absorbs most of the impact with smaller side pads adding extra protection if you slide down the trail. The whole knee is often covered with Kevlar or Cordura for abrasion resistance.
Cutaway
To stop chafing on the ligaments at the back of the knee lightweight pads are often totally cutaway in this area with a more gentle seam and finishing.
Gripper
To hold the pad up manufacturers often put a small strip of silicone on the top and bottom seams. It can irritate the skin however, so some manufacturers use slightly smaller strips or eliminate it all together, preferring a stretchy hem instead.
Strap
It’s not common on lightweight kneepads but a couple of models have straps on the top seam to adjust the fit and get the kneepad tight. Straps add weight and cost though, and the Velcro can often pick holes in the Lycra or mesh.
