Thursday, April 28, 2016

Hiking Shoes vs. Hiking Boots

Hiking boots come in a plethora of shapes and sizes. Even using the word “boot” no longer encompasses all of the different options available to the foot conscious outdoorsman. Hiking Shoes, Hiking Sandals, Cross Trainers, Ultra-lite Boots – combined with all the of the different types of brands, materials, and styles it is enough to give anyone who grew up with two brands, who both offered the stiff leather variety, some serious Paradox of Choice.
What are the differences? When are hiking shoes appropriate and not heavy boots? Are they worth the price difference?
We’ll start with some basic features of each and then elaborate on which conditions demand which type of “boot”.

Hiking Sandal

It may come as a bit of a surprise to some, but hiking sandals can be a great option for a casual hiker. Sandals are super lite, which means you aren’t going to expend as much energy moving your feet over the course of the hike. They are also perfect for water crossings or as foot liberating camp shoes. Many people prefer a sandal with some kind of toe guard to help protected against miscellaneous rocks and roots. For most, hiking sandals are best used for short well maintained trails or as a lite back up when their primary boots are temporarily out of commission.
Look for sandals with similar features to most good hiking shoes: stitch materials, tough soles, and good arch supports.
Ahnu Reyes III Performance Sandal

Trail Shoes or Hiking Shoes

Trail shoes are all the rage in hiking communities due to their compromise between comfort and functionality. They are sturdier than your average running shoe because of their thicker soles and leather reinforced fabrics while at the same time are lighter and more comfortable than standard hiking boots. Because of their versatility, trails shoe styles have started to become part of a more mainstream fashion. Be sure to double check standard quality measures such as stitching, arch support, waterproofing, and lace design so as to avoid buying shoes that look like trail shoes but don’t function in the same way.

Trail Running Shoes

Saucony Adapt Trail Shoe
Trail running has also exploded in popularity in recent years. Shoes designed specifically for trail running are similar to standard trail shoes with a few subtle differences. Most trail running shoes have a bit more padding, tough soles, and slightly more ankle support. These shoes can be quite expensive, so if you aren’t planning on running up the mountain, you can probably go with a standard trail shoe.

Mid-weight Hiking Boot

Mammut Teton GTX Hiking BootMammut Teton GTX Hiking BootMany people would just call this “a hiking boot”. A mid weight boot is what most people think of when they think of hiking footwear. They have extra ankle support, stiff foot support, and reinforced leather or synthetic outer layer. They are versatile and rarely feel like overkill on a trail of moderate difficulty. Sure, they will be a bit heavier, but unless you are using them on a multi-day, long term trek, you probably won’t even notice. Don’t forget to look for staple signs of quality: Waterproof outside, good stitched soles, and a Gore-Tex inner lining.
Remember to give yourself a few days to break in new boots. While modern Mid-weight boots take significantly less time to break in than their 30 year old all leather grandparents, you should still dedicate three to four days to breaking in your new Mid-weight boots.

Heavy Boot

For the true trail blazers in the crowd, these boats are for you. Quite literally, unless you plan on spending a significant amount of time out in the woods where there are no blaze to follow, it is hard to justify a heavy boot. However, if you do fall into the category of serious boulder climber or rugged bushwhackers, you know that a heavy boot can be your best friend.
A good heavy boot should feel like a cross between mountaineering boots and a hiking boot. They should provide extra grip with knobby soles and possibly a crampon on the lip. The ankle support should not only protect your ankle from twisting but also protect it from briars and any water or mud if you are unfortunate enough to find yourself in a situation where mud protection is necessary.
Of course, for all of this protection you pay a price, both physically and financially. Heavy boots are, well, heavy! The extra metal, rubber, and leather that go into making them great at keeping you high and dry also makes them cost more and over time, will weigh you down. Don’t expect them to be super comfortable either. These kinds of boots are designed for hard work and will be overkill for anything else!

When do I need hiking boots?

1) When trails are particularly rocky, covered in roots, or are made uneven by other objects in the trail.
2) When the trail is wet.
3) When there the possibility of rolling your ankle is high.
4) When trails are exceptionally steep.
5) When hiking in the snow.

When will hiking shoes be ok?

1) Well maintained even trails.
2) Day hikes
3) Trail running
4) Campsites

Sunday, April 24, 2016

MTB Bleeding Brake Mistakes

If there's one thing better than learning from your mistakes, it's learning from somebody else's mistakes and when it comes to bleeding mountain bike brakes there are a few mistakes which crop up time and again.
Although brake bleeding is considered a pretty simple process by many, getting it wrong can at the very least ruin your riding plans. Worse still it can cause serious damage to your brakes resulting in longer periods off the trails.
If you're a novice considering bleeding your brakes for the first time use these five tips to get a head start and save yourself a bit of potential embarrassment amongst your riding buddies.
For the rest of you it will serve as a bit of a reminder about what not to do when bleeding your brakes. After all everybody makes mistakes, right?

#1 Brake Pad/Rotor Contamination

Brake pad and rotor fluid contamination
This has got to be far and away the most common mistake made during brake bleeding.
I too have been caught wondering why my brakes feel like crap following what seemed like a decent bleed. The problem was of course brake fluid on the pads.
Brake fluid spillages from an open reservoir bath, or over-spray from a syringe disconnection while filling the brake system can render your brake pads useless.
Unless you've had an obvious spillage the first sign of pad/rotor contamination is usually when you start riding again.
Classic symptoms would include a firm brake lever (as you have already removed the air from the system) but terrible stopping performance since there will be lack of friction between the pads and rotor due to the brake fluid acting as a lubricant. Oh and usually one hell of a loud, juddering squeal under braking.

How to Avoid:

The problem is easily avoidable by removing the wheel and brake pads before starting the bleed process.
By removing the wheel and brake pads and using a bleed block instead, you'll not only keep your brake pads free from destructive brake fluid, you'll also avoid over filling the brake system with brake fluid too (see #5).

#2 Using the Wrong Brake Fluid


There are two types of brake fluid used in mountain bike brakes today. DOT fluid and mineral oil.
Which one you use is not up for discussion, you should only use the fluid your brake was designed to use.
Syringes filled with brake fluidIntroducing the wrong fluid into your brake will have adverse effects on your brakes performance. Problems will include but are not limited to:

  • Changes in brake 'feel' and characteristic. e.g. brake may become sluggish and less responsive.
  • Damage to internal seals through corrosion and/or swelling.
  • Separation and pooling of brake fluid inside brake lines due to DOT fluid/Mineral oil incompatibility.

How to Avoid:

Be clear before you start the bleed process which brake fluid your brake requires.
As brake manufacturers tend to stick to one or the other, the table below can be used as a reference to find out which brake fluid you should use.
MTB Brake manufacturers and their choice of brake fluid
This table should be used as a reference only. Some manufacturers use both types of fluid in their range of brakes so double check before you begin the bleed process.
The brake fluid type can usually be found written on the master cylinder or brake lever assembly, commonly placed on the reservoir cap or around the bleed port screw.

#3 Using Brake Fluid from an Old Container

Although using old brake fluid isn't as bad as using the wrong type of fluid in your brake, it's not the most helpful either.
DOT fluid, unlike mineral oil, is hygroscopic, meaning it will absorb water from the environment, even at normal atmospheric pressure. This water content is a problem for two reasons.

  • Any water content will reduce the boiling temperature of the brake fluid. This affects the performance of the fluid after heavy braking periods, causing fluid fade to occur earlier compared to fresh fluid.
  • Water content will eventually cause corrosion of the internal parts of the brake if left for long periods of time.
Two very good reasons for purging the system of old DOT brake fluid annually.

So when does brake fluid become old?

Good question, and the answer will change depending on who you ask.
The safest approach is to use DOT fluid only from sealed containers, and always replace the cap immediately after you've taken out what you need. Brake fluid in larger containers (500ml-1L) which has been hanging around in your garage for over 6 months are best avoided.

How to Avoid:

Keeping several smaller bottles is far better than buying a large container and keeping it for several years. The fluid in the larger container will start to deteriorate after opening it for the first time, whereas you can open several smaller containers as you need them knowing that the fluid is fresh.

#4 Over-tightening Bleed Adaptors and Fittings

Brake pad and rotor fluid contamination
Since the only thing allowing you to create an air tight seal between the bleed kit and the bleed port is often a small rubber o-ring, it's not surprising how easily they can be damaged by over tightening.
Over tightening bleed kit fittings is the main reason why some folk struggle to get a good seal when bleeding brakes.
Applying too much pressure to bleed fittings can crush, stretch or deform the o-ring making it impossible to maintain the essential air tight seal between the bleed kit and your brake.

How to Avoid:

Less is more when connecting bleed fittings. Tighten until finger tight and never use tools.
If you struggle to achieve a good seal it might help to un-tighten the fitting slightly to release the pressure on the rubber o-ring.

#5 Over-filling the Brake System

Avid brake bleed
Over-filling the brake system with brake fluid happens when the brake is bled without resetting the position of the calliper pistons beforehand.
The most common example of why this would happen is if the system is bled with part worn brake pads in situ.
As brake pads wear the calliper pistons advance outwards to compensate. This keeps the pads close to the rotor resulting in a consistent brake lever feel and bite point.
Over filling the system with brake fluid can make replacing the brake pads an impossible task. The extra fluid in the brake system will prevent you from pushing the pistons back into their reset position - a necessary step creating the necessary space to accommodate the new brake pads.

How to Avoid:

To avoid this problem remove your brake pads, fully push back the pistons and insert a bleed block between the pistons to keep them there. This will ensure that the correct amount of brake fluid is left in the brake system during and after the bleed process.
If you suspect that your brake is over filled you will need to remove the excess brake fluid.
Always vent out excess brake fluid from the highest point in the brake system - the lever. This will stop air entering the system.
Simply loosen the lever bleed port screw or reservoir top cap and push back the calliper pistons to their fully reset position. This will evacuate the excess brake fluid leaving behind the correct amount.

How about you?

So there's my top five tips on what not do do when bleeding your mountain bike brakes.
How about you? Have you ran into trouble during the bleed process? How did you get out of trouble? Share your problems with us in the comments below.
P.S. Please Like, Tweet or +1 this guide and help your friends to avoid these five common mistakes when bleeding their brakes. Thank you.

Tuesday, April 19, 2016

What Dropper Seatpost Should I Buy?

They go down. They go up. Here’s what else to look for in a dropper seatpost.
Dropper seatposts are one of the greatest cycling innovations of modern times. Although variations of them have been around for a good number of years it’s only really in the past two or three years that they’ve become a common sight on bikes.
They are still relatively expensive items but you’ll struggle to find anyone who’s bought one who doesn’t say that a dropper post is one of the best things that they’ve bought for their bike.

Why are dropper posts so good?

They make riding more fun. And fun is what it’s all about.
Being able to get the saddle out of the way on-the-fly is a real game-changer.
No more hanging off the back of the saddle on descents and impairing your bike control. You can get your centre of gravity low down and central, where it should be.
No more being mildly battered as you try to hover over the saddle when pedalling over lumpy traverses.
And – most significantly – no more having to stop, get off, fiddle with seatpost QRs. Hurray!
Once you’ve ridden with a dropper post you’ll never want to go back to static post ever again.

How do dropper posts vary?

Most dropper posts these days are remotely operated by a switch on the handlebar. There are still some designs that use an under-the-saddle-nose grab-lever but these have fallen out of favour because it’s simply so much better (and safer) to be able to operate the seatpost from the bars.
The majority of dropper posts offer 125mm of drop. There are some that only offer 100mm – which is good for smaller riders. There are a few that offer a whopping 150mm of drop – good for tall riders who tackle extreme terrain.
The cabling system will either be hydraulic hose (like a disc brake) or cable-actuated (like a gear cable inner and outer). There are pros and cons to each.

Hose or cable?

Cable-actuated systems can offer great levels of feel and accuracy but they will be prone to dirt and water ingress. You also need to route the cabling carefully so as to avoid tight bends which will cause excessive friction in the cable actuation.
Hydraulic cable (like on the market-leading RockShox Reverb) can feel a bit vague or imprecise compared to a well set up cable-actuated system but it is sealed against the elements and is much more tolerant of circuitous cable routing.
Most dropper posts offer infinite height adjustment ie you can leave the post at any setting in its travel and it will stay there. If you’re going to want to set the seatpost to such a mid-point setting frequently then consider getting a cable-actuated dropper post – they’re usually more precise than hydraulic hosed posts.

Remote control

The actual remote control lever on the handlebar varies in design too. Some hydraulic cable posts have a plunger style ‘long button’. Cable-actuated designs vary from large push-push twin-blade levers or minimalist rocker levers or pivoting-pushrod ‘floating socket’ designs.
Dropper posts differ in feel and speed of operation ie some compress and extend slower – or have a more damped motion – than others. A lot of dropper posts offer the ability to adjust the speed of re-extension. Check the post’s specification list.

Internals, clamps and diameters

rockshox reverb stealthThe internals of dropper posts do vary but you don’t need to know much about the specifics of each design. They are fairly complex (like the insides of a suspension fork). Some are more home-serviceable than others
As with static seatposts, dropper posts can come with inline clamp heads or layback clamp heads. These days saddle rails offer enough adjustment to cope with either clamp head style but it’s something to be aware of if you currently have your saddle positioned at the extremes of its rails.
And obviously you need to make sure you buy the seatpost that fits your frame’s seat tube. 30.9mm and 31.6mm are the common sizes of dropper posts. If you’re unsure of your seatpost size, simply remove your existng seatpost and there should be a number written on it somewhere.

Stealth

Some dropper posts are available in ‘stealth‘ versions. These are designs where the hose/cable enters the very bottom end of the seat post (rather than the normal desing where the cable enters the post at the head clamp end.
Stealth designs do not fit all frames. They only fit frames that have specific stealth routing ie a purpose-made porthole in the seat tube usually just above where a front mech clamp would be.
If you have such a frame you’ll know this already. If you’re not sure, then you almost certainly do not have a Stealth-compatible frame.

Which dropper seat post should you buy?

Casual riders should consider dipping their toes in to the world of dropper posts. They can often be the one component that helps a rider progress faster and further than any other. The best bet is to buy based on price. Stick to a $300 budget. Go for a 100mm travel post if you find one cheap enough.

Regular riders should go for a dropper post with a hydraulic hose actuation and 125mm of travel. Most of us weekend warriors only run the post in two settings – fully down or fully up – so there’s no need for the micro-feel of a well set up cable actuated system. The weather-proofing and less finicky cable routing will be more important and valued.

Enduro racers may think about a cable actuated post. Although such posts can look like they’re a bit agricultural (we like our hydraulic hoses us mountain bikers) cable actuated posts offer high levels of feel and control and speed-of-operation. Racers also won’t mind having to keep an eye on and service/maintain the cabling in return for improved performance during racing.

Saturday, April 16, 2016

Brakes and Pads

Formula 2-Piece brake rotorIn contrast to standard stainless steel rotors, 2-piece rotors combine a stainless steel rub area with an aluminium carrier (or spider). The advantage of the alloy carrier are a cooler running disc as aluminium has superior heat dissipation qualities to that of stainless steel. This will also help to keep your pads, calliper and fluid cooler. Aluminium is also lighter than stainless steel so a reduction in weight can be expected.


CenterLock - The Shimano CenterLock system eliminates the risk of stripping threads as there are no bolts to worry about, just one centre locking ring. Installation and removal is also simplified, although you will need a CenterLock tool. Lack of mass-market adoption means that hub choices are limited and brake choice may also be limited due to odd sized rotors. CenterLock rotors are also generally slightly heavier and can come at a price premium. Brake rotor design


Sintered brake pads are made up of hardened metallic ingredients which are bound together with pressure and high temperature. The advantages of this compound are better heat dissipation, a longer lasting pad, better resistance to fading and superior performance in wet conditions. The trade-offs are more noise, longer bed-in time and a poor initial bite until the friction material has chance to warm. Sintered brake pads


Organic pads then are probably more suited to less aggressive riding in mostly dry conditions. Organic brake pads

Hydraulic Brakes

Hydraulic brakes have transformed mountain bike disciplines ever since their arrival. They enable us to go faster and stop harder. So what is it about hydraulic brakes which make them the stoppers of choice for professionals and trail riders alike? First a little bit about hydraulics..

Hydraulics

The principle behind any hydraulic system is simple: forces that are applied at
one point are transmitted to another point by means of an incompressible fluid. In brakes we call this brake fluid of which there are a few different varieties, but more on that later.

As is common in hydraulics the initial force which is applied to operate the system is multiplied in the process. The amount of multiplication can be found by comparing the sizes of the pistons at either end. In braking systems for example, the piston driving the fluid is smaller than the pistons operating the brake pads therefore the force is multiplied helping you to brake easily and more efficiently.

Another convenient characteristic of hydraulics is that the pipes containing the fluid can be any size, length or shape allowing the lines to be fed almost anywhere. They can also be split to enable one master cylinder to operate two or more slave cylinders if needed.

Components

Now that we understand hydraulics let's take a look at the different parts which make up the hydraulic brake. The entire braking system can be broken down into the following main parts:
  • Master cylinder (Lever)
  • Lines
  • Fluid
  • Slave cylinder (Caliper)
  • Pads
  • Rotor
Next we will explain these components in more detail.

Master Cylinder/Lever

The master cylinder, mounted to the handlebar, houses the brake lever and together they produce the input force needed to push hydraulic brake fluid to the slave cylinder (or caliper) and cause the brake pads to clamp the rotor.

The lever stroke can be divided into 3 categories:

1. Dead-stroke - This is the initial part of the lever stroke when the primary seal pushes fluid toward the reservoir before it goes on to push fluid on to the caliper via the brake lines.

2. Pad Gap Stroke - This is the part between the caliper beginning to push the pistons out of their housings and the pads contacting the disc (as the dead space between the pads and rotor is taken up).

3. Contact & Modulation - The pads are now clamping the rotor and by stroking the lever further, additional brake power will be generated. Modulation is rider controlled and not necessarily a characteristic of the braking system, however some brakes may allow the rider to better modulate or control the braking forces than others.

Open or Closed?

Master cylinder systems can be categorised into two groups - open and closed.

An open system includes a reservoir and bladder which allow for fluid to be added or removed from the braking system automatically during use. Reservoirs are the overflow for fluid which has expanded due to heat produced by braking. The bladder has the ability to expand and contract therefore as the fluid expands the bladder will compensate without any adverse effects on the 'feel' of the brake. Reservoirs also provide the additional fluid needed as the pads begin to wear resulting in the need for the pistons to protrude further to compensate for the reduced pad material.

A closed system also utilises a reservoir of brake fluid, however the lack of an internal bladder to compensate for the expansion in brake fluid and also to compensate for pad wear means that any adjustments to the levels of brake fluid within the working system need to be made manually.

Brake Lines

Hydraulic brake lines or hoses play the important role of connecting the two main working parts of the brake, i.e. the master cylinder and slave cylinder. We've already mentioned that hydraulic systems can be very versatile in that their lines or hoses can be routed almost anywhere so let's take a closer look.

Hose Construction

Hydraulic hoses are multi-layered in their construction and usually consist of 3 layers:

1. Inner Tube - this layer of tubing is designed to hold the fluid. Teflon is usually the material of choice here as it does not react or corrode with brake fluid.

2. Aramid (Kevlar) Layer - provides the strength and structure of the hose. This woven layer is flexible and handles the high pressures of the hydraulic system efficiently in that it should not expand. Kevlar is also very light, which is a desirable attribute for any cycle component, and also it can be cut easily and re-assembled using standard hose fittings.

3. Outer Casing - Serves as a protection layer for both the Kevlar layer and the bike frame to reduce abrasions. Hydraulic Hose Construction
The layers that make up an average hydraulic brake line

Steel Braided Brake Lines

Steel braided hoses can provide some advantages over standard hydraulic hoses. Steel braided hoses are also usually a 3-layer construction, the inner most layer contains the brake fluid and there is an outer most layer which provides protection against abrasions. The key difference is in the middle layer which is made up of a stainless steel braid.

This stainless steel layer is designed to be more resistant against expansion than that of standard lines. This can be an advantage because when the brake lever is applied we want all of the force we put in to be transferred to the caliper to cause braking. Any expansion in the hydraulic line due to the pressures within will mean that some of that pressure will not be transferred to the caliper. This will be wasted effort and will require additional lever input by the rider to compensate.

Formula R1 brakeSteel braided lines may also be more appealing aesthetically. Many riders believe that they look better than the standard, boring black hoses that are supplied with the vast majority of brakes on the market.
2011 Formula R1 brake with braided brake lines

Brake Fluid

Hydraulic braking systems typically use one of two types of brake fluid - DOT fluid or mineral oil. An important thing to note before we get into the properties of each is that the two fluids should never be mixed. They are made up of very different chemicals and the seals within the braking system are suited to either fluid and not both; therefor mixing or replacing one fluid with the other is likely to corrode the internals of your brake.

On the other hand, mixing fluid from the same family is allowed but not generally advised. For example you may mix DOT 4 fluid with DOT 5.1 without harming your braking system.

DOT Brake Fluid

DOT brake fluid is approved and controlled by the Department of Transportation. It has to meet certain performance criteria to be used within braking systems and is classified by its performance properties - mainly its boiling points.

DOT 3, 4 and 5.1 brake fluid are glycol-ether based and are made up of various solvents and chemicals. Glycol-ether brake fluids are hygroscopic, which means they absorb water from the environment even at normal atmospheric pressure levels. The typical absorption rate is quoted to be around 3% per year. This water content within the brake fluid will affect the performance by reducing its boiling point. Which is why it is recommended to change brake fluid every 1-2 years at most.

The table below shows DOT brake fluid in its various derivatives with its corresponding boiling temperatures. Wet boiling point refers to fluid with water content after 1 years' service.
DOT Fluid Dry Boiling Point Wet Boiling Point
DOT 3 205 °C (401 °F) 140 °C (284 °F)
DOT 4 230 °C (446 °F) 155 °C (311 °F)
DOT 5 260 °C (500 °F) 180 °C (356 °F)
DOT 5.1 270 °C (518 °F) 190 °C (374 °F)

DOT brake fluid is commonly used in Avid, Formula, Hayes and Hope brakes.

DOT 5 Brake Fluid

DOT 5 brake fluid (not to be mistaken for DOT 5.1) is very different from other DOT fluids as it is silicone based and not glycol-ether based. This silicone based brake fluid is hydrophobic (non water absorbing) and must never be mixed with any other DOT brake fluid.

DOT 5 can maintain an acceptable boiling point throughout its service life although the way in which it repels water can cause any water content to pool and freeze/boil in the system over time - the main reason that hygroscopic fluids are more commonly used.

Mineral Oil

Mineral oil is less controlled as a brake fluid, unlike DOT fluid which is required to meet a specific criteria, therefore less is known regarding its performance and boiling points from brand to brand.

Manufacturers such as Shimano and Magura design their brakes around their own brand of mineral oil and should never be introduced to DOT brake fluid as this will likely have an adverse effect on the brake's seals.

An advantage of mineral oil is that, unlike most DOT fluids, it does not absorb water. This means that the brake will not need to be serviced as often, but any water content within the braking system could pool and freeze/boil adversely affecting the performance of the brake.

Mineral oil is also non-corrosive meaning handling of the fluid and spillages are less of a concern.

Slave Cylinder/Calliper

The brake callipers reside at each wheel and respond to the lever input generated by the user. This lever input is converted to clamping force as the pistons move the brake pads to contact the rotor. Callipers can be fixed by a rigid mount to the frame or floating. Fixed callipers are combined with a fixed rotor which offers the only way of achieving zero free running drag, one drawback of this design is that it is much less tolerant of rotor imperfections. Floating callipers slide axially and self-centre with each braking application.

Construction

Calliper construction can fall into two categories - mono-block and two piece. The difference here is the 'bridge' design, the bridge is the part of the calliper above the pistons which connects the two halves together and provides the strength to endure the clamping forces generated by the pistons.

1. Mono-block - A mono-block calliper is actually a one piece design formed from one piece of material. This can offer a unique design and usually a lighter calliper as there is no need for steel bolts joining both halves as in a two piece design. Also the lack of a transfer port seal means there is one less opportunity for fluid leaks at the half way seam. Servicing a mono-block calliper can be tricky however and manufacturing and assembly are usually more difficult.

2. Two piece - These two piece callipers are constructed as two separate halves and are then held together with steel bolts which can provide additional strength over a mono-block design. Servicing, manufacturing and assembly are simplified. Steel bolts and additional seals are a means of additional weight and can be problematic during servicing. 
Exploded view of an Avid two-piece calliper design

Pistons

The pistons are the cylindrical components housed within the calliper body. Upon lever input they protrude to push the brake pads which contact the rotor. The number of pistons within a calliper or brake can differ. Many hydraulic mountain bike brakes have 2 piston callipers, some may have 4 pistons. Whereas some automobile brake callipers have 6 or even 8 pistons. It is an important note that brake power is not determined by piston quantity. A more reliable indicator would be total piston contact area, e.g. 4 smaller pistons can be just as powerful as 2 larger pistons.

Pistons can be either opposed or single sided. Opposed pistons both protrude with lever input to push the brake pads equal amounts to meet the rotor at both sides. Whereas single sided calliper pistons stroke on one side and float the rotor to the opposite pad.

Brake Pads

Choosing the right brake pads can mean the difference between a great and a poor performing brake. With the sheer diversity of brake pad materials out there it is quite easy to get it wrong when the time comes to replace the pads.

Let's jump right in and take a look at the different pad materials available and their properties.

Organic

Organic brake pads contain no metal content. They are made up of a variation of materials which used to include asbestos until its use was banned. These days you will commonly find materials such as rubber, Kevlar and even glass. These various materials are then bonded with a high-heat-withstanding resin. An advantage of organic pads is that they're made up of materials that don't pollute as they wear. They are also softer than other brake pads and as a result quieter. Also they inflict much less wear upon the brakes' rotor. However organic pads wear down faster and they perform especially poorly in wet gritty conditions (UK readers take note :).

Semi-metallic

Semi-metallic brake padsThe metallic content of semi-metallic pads can vary from anything between 30% and 65%. The introduction of metal content into the friction material changes things slightly. It can improve the lifespan of the pad quite significantly as metal wears slower than organic materials. Also heat dissipation is improved as it is transferred between the pad material and the backing plate. Some disadvantages can include increased noise during use and the harder compound means increased wear on the rotor.

Sintered

Ceramic

Ceramic brake padsCeramic brake pads are now seen more and more as an alternative/upgrade mountain bike brake pad. Traditionally ceramic brake pads would only be seen on high performance racing cars with brakes which need to perform under intense heat. Heat like that is not usually a problem for the average mountain bike brake and therefor for most people ceramic pads would be overkill, however they might have other desirable properties. The advantages of a ceramic material then is one which can cope with extreme heat and keep performing strongly; this is in part down to its great dissipating abilities. They also last longer than other pads and noise is less of an issue. They're also easier on brake rotors and produce a lot less dust that other brake pad compounds.

Rotors

Rotor size has a direct effect on braking power. The larger the brake rotor the more power will be produced for any given input. This can be a concern with larger rotors as they tend to have more of a 'grabby' feel making the brake more difficult to modulate.

Mountain bike rotors tend to range in size from 160mm to 203mm, with smaller rotors geared toward XC type riding and larger rotors designed for downhill riding.

Rotor Design

Important specifications of rotor design include hardness, thickness and rub area.

The material used to manufacture rotors must be hard and durable due to the aggressive forces inflicted upon them from the pad friction material. This has a direct impact on rotor wear.

Rotors must also have no thickness variations. Differences in thickness around the circumference of the rotor can have undesired effects on the braking system including pulsing as thicker and thinner sections pass between the pads. Rotors also need to run true. Any lateral wobble in the rotor during use can cause the brake to contact the pads intermittently during riding.
Brake rotor design
Left to right: Formula Lightweight, Avid G3 Clean Sweep, Ashima AiRotor
A rotor's rub area can take the form of many different designs. The three rotors above show this in detail. Rub area design can affect the weight and strength of the rotor. It also has a direct effect on pad lifetime.

Six Bolt or CenterLock?

The two types of rotor on the market today are ISO standard 6-bolt rotors and CenterLock rotors. Both have their pros and cons.

6 Bolt - Readily available and interchangeable between many brake models, this is the most common rotor fixing system in use today and was adopted by all manufacturers in the late 1990's. With no shortage of hub options, cross-compatibility with other products is rarely a problem. However installation of six fixing bolts can be cumbersome and there is always the risk of stripping a thread on fixing bolts and hub mounting points.

Left to right: ISO standard 6-bolt, Shimano CenterLock

2-Piece Rotors

2-Piece rotors are supplied as standard with some higher priced brake sets and can also be bought separately as a brake upgrade.

Formula 2-Piece Stainless Steel / Aluminium Rotor

Why Brakes Fail

Hydraulic brakes can fail or temporarily stop working for numerous reasons such as a simple (but potentially catastrophic) fluid leak or eventual brake fade after prolonged use. Knowing the causes of brake failure can be valuable knowledge in curing the problem and preventing future episodes.

As we know there are a couple of important principles behind hydraulic brakes. Hydraulics rely on pressure within the system and brakes rely on friction. Absence of either will result in failure of the system. For example, a loss of brake fluid will decrease the pressure within the system as the lever has nothing to transfer the input forces to. On the other hand if brake fluid contacts the brake pads or rotor, a loss of friction will occur due to the lubricating nature of brake fluid.

The above examples should be obvious to most but what about the less obvious causes of brake failure? Earlier we mentioned brake fade, a term which I bet many of you have heard, however did you know that there are multiple types of brake fade? Below is an overview of the three different types.

Pad Fade

All friction material (the stuff your pads are made of) has a coefficient of friction curve over temperature. Friction materials have an optimal working temperature where the coefficient of friction is at its highest. Further hard use of the brake will send the friction material over the optimal working temperature causing the coefficient of friction curve to decline.

This high temperature can cause certain elements within the friction material to melt or smear causing a lubrication effect, this is the classic glazed pad. Usually the binding resin starts to fail first, then even the metallic particles of the friction material can melt. At very high temperatures the friction material can start to vaporize causing the pad to slide on a layer of vaporized material which acts as a lubricant.

The characteristics of pad fade are a firm, non-spongy lever feel in a brake that won't stop, even if you are squeezing as hard as you can. Usually the onset is slow giving you time to compensate but some friction materials have a sudden drop off of friction under high temperatures resulting in sudden fade.

Green Fade

Green fade is perhaps the most dangerous type of fade which manifests itself on brand new brake pads. Brake pads are made of different types of heat resistant materials bound together with a resin binder. On a new brake pad these resins will cure when used hard on their first few heat cycles and the new pad can hydroplane on this layer of excreted gas.

Green fade is considered the most dangerous as it can catch users unaware given its quick onset. Many people would consider new brake pads to be perfect and may be used hard from the word 'go'.

Correct bedding-in of the brake pads can prevent green fade. This process removes the top layer of the friction material and keys the new pad and rotor together under controlled conditions.

Fluid Fade

Fluid fade is caused by heat induced boiling of the brake fluid in the callipers and brake lines. When used under extreme conditions heat from the pads can transfer to the calliper and brake fluid causing it to boil, producing bubbles in the braking system. Since bubbles are compressible this results in a spongy lever feel and prevents the lever input from being sent to the calliper.

The major cause of fluid fade is absorbed water from the air under normal atmospheric conditions which reduces the boiling temperature of the brake fluid. DOT brake fluid has an affinity for absorbing water from the air around it, especially in hot humid conditions. This is the main reason why we replace brake fluid on an annual basis.

Fortunately fluid fade has a gradual onset giving the user time to compensate for potential loss of braking.

Tuesday, April 12, 2016

 Road Bikes:  Disc or Rim Brakes

The last decade or so has seen some massive changes for road bikes. The mainstream shift from aluminum to carbon fiber in the 2000’s marked the beginning of a new era in bike design, while the introduction of electronic drivetrains in the last 5 years or so has seen a fundamental rethinking of how bikes shift. But what about how bikes stop?
It started slowly. Very slowly, in fact. But in the last year or two, disc brakes on road bikes have really caught on, and are set to create yet another revolution. As always, there are fits and starts, and not everybody is on board (we’re looking at you, UCI), but like most changes, this one is gaining momentum.
Over the last year we’ve had a chance to test ride quite a few disc brake road bikes. Here’s how we thought they fared versus standard rim brakes.

STOPPING POWER

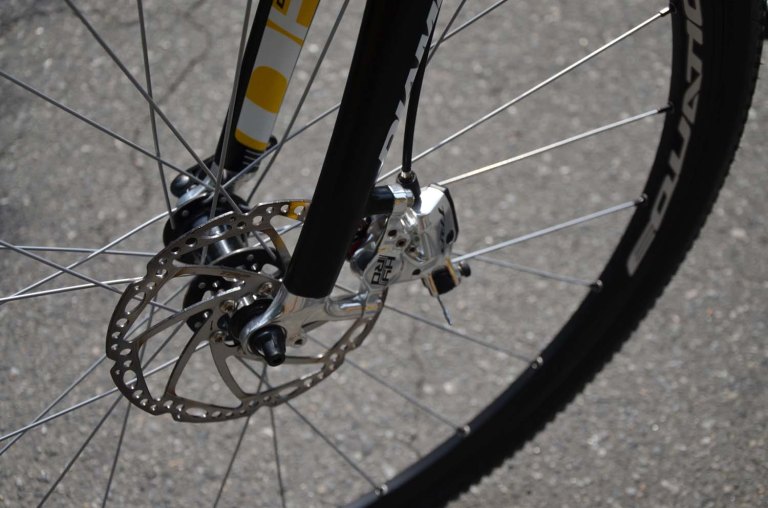
Disc brakes. There is no question about this. Disc brakes deliver incredible stopping power in pretty much all weather conditions. What’s more, that power is easily modulated, which means it’s easier to control how much brake you need at any given time. Often times no more than one-finger  is needed to stop the bike in a reasonable distance.
Rim brakes, especially with carbon wheels, can sometimes take a little bit to really bite into the rim and slow the bike. This is doubly true if your pads are worn or dirty.


Disc brakes provide superior stopping power and modulation over rim brakes

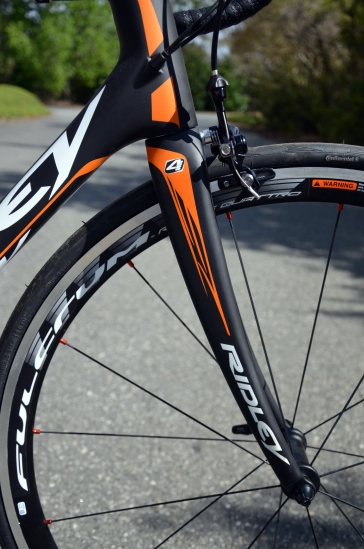
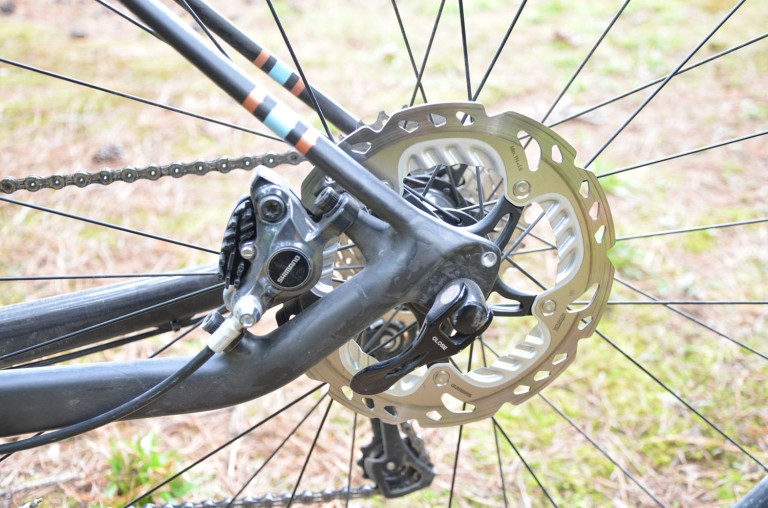
The upward slant of the chainstay helps to minimize hits from bad roads, and helps perfectly position the disc caliperCOMPATIBILITY

Rim brakes—for now. Disc brakes are still going through growing pains, and in an industry where the term “standard” is pretty much meaningless, that can mean some headaches for consumers. Some disc brake bikes come with standard quick release wheels, some use thru axle. There are all different kinds of rotor sizes out there, and aftermarket wheel options are still fairly limited.
But these are actually fairly minor problems.
This year will pretty much guarantee a bumper crop of disc brake wheel options, and most of those will be interchangeable between QR and thru axle, making them more versatile for consumers.


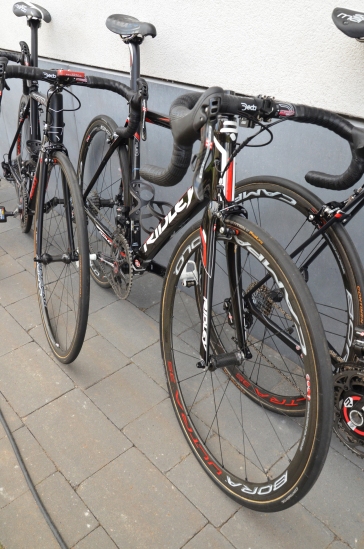
ridley_helium_06
For the moment, rim brakes have fewer compatibility issues than disc brakes

WET WEATHER

Disc brakes. This is a no brainer. No matter what is falling from the sky or laying on the roads, disc brakes don’t care. Snow, ice, and rain don’t have much of an effect on disc brakes—regardless of rim material.
DSC_0686Wet weather conditions can severely limit the effectiveness of rim brakes, especially carbon wheels.


If you’re riding in wet weather, there’s only one way to go when it comes to brakes


EASE OF INSTALLATION AND MAINTENANCE

Rim brakes. Frankly, these are pretty easy. Make sure they’re facing the right way, bolt them on, make sure they’re roughly centered and go. Every other year or so you change the pads.
Disc brakes…not so much. Mechanical disc brakes can be notoriously frustrating to install and get centered so they aren’t rubbing the disc rotor. Hydraulic disc brakes are easier to install, but maintenance can be an involved and time consuming, since you have to bleed the lines, replace hydraulic fluid, etc…


fenix_03
For all their benefits, disc brakes aren’t always as easy to maintain as rim brakes

WEIGHT AND AERODYNAMICS

Rim brakes. Because of the simple design, rim brakes are currently much, much lighter than any available disc brake system.
And, because of where the brake is placed, disc brakes are also much less aerodynamic than rim brakes.
Bear in mind though that this is  likely to change in the next couple of years. As disc brakes become more widely adopted and pressure builds to use them in racing, the industry is likely to begin refining the designs to be lighter, and better incorporated into frames for improved aerodynamics.


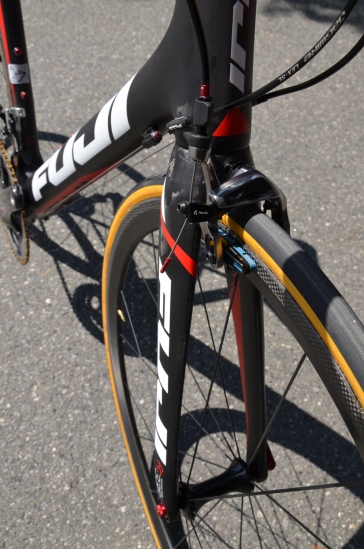
fuji_altamira_sl_007
What they lack in stopping power, rim brakes make up for in weight savings and aerodynamics

THE VERDICT

More than any other decision, this is going to be a very personal choice. Disc brakes offer unquestionably better and more consistent stopping power than rim brakes, but at a cost of weight and aerodynamics, and they are still not yet race-legal.
It’s all a matter of what’s most important to you—and we don’t mean stopping power (that’s important to everyone).
What we mean is that if you love racing, fast road riding, and having plenty of wheel options, then it might be best to stick with rim brakes for the time being.
If you’re just looking for a road bike to ride for the love of riding, like to explore gravel roads, bomb big descents, ride in an area that experiences frequent bad weather, or even for racers looking for a second road bike for training and base miles, then disc brakes are probably the better option.
Without question though, disc brakes are the way forward—so love them or hate them, odds are in the next 5 years, most road bikes will be equipped with them.

None the less, Elevation Ski and Bike will assist you with maintenance and make sure you are comfortable with your choice.


Breckenridge Hiking

There are miles and miles of scenic Breckenridge hiking trails to be enjoyed right here in the area, some of which you can access without ever getting in your car! Breckenridge hiking offers something for every visitor.  Whether you want to stroll through fields of wildflowers or summit a 14,000 foot mountain peak, we’ve got you covered.

A Few Great Breckenridge Hiking and Snowshoe Trails
Boreas Pass – This dirt road follows the old railroad route along Boreas pass. It
is a gentle incline with fabulous views of the 10 Mile Range and Quandary Peak. Drive South on Hwy 9 (Main Street) and turn left onto Boreas Pass Road. Follow the road to the point where the road turns to dirt. (10-15 minutes). Park in the lot and begin walking here. You may encounter occasional car and bike traffic. This hike is an out and back. It is three miles to Bakers Tank and just under six and a half miles to the old Boreas Station at the top of the pass. This is also a great snowshoe trail.

Bakers Tank Loop – This is a six mile loop that begins at the Boreas Pass Lot. Look for the trailhead marker on the left hand side of the road. This trail winds up the hill through the woods and comes out at Bakers Tank on Boreas Pass Road (about 3.5 miles from the parking lot). When you come to an intersection along the way with multiple options, follow the blue blazes. The trail will bring you back down to Boreas Pass Road after about three miles, at Bakers Tank. From there, follow the dirt road back to the parking lot. This is also a great snowshoe trail.

Sally Barber Mine – From Main Street turn on to Wellington Road. From here, the trailhead is 3.9 miles on the right hand side. Follow Wellington up the hill, staying right at the Y intersection of Wellington and Reiling Road (1.1 miles). You will now be on French Gulch Road. From this point, continue on French Gulch Road until you see the parking lot, walk along the road for one tenth of a mile turn right at the fork with the gate across the trail. Continue along the old mining road another mile or so. You will see the remains of the Sally Barber Mine on your right, and you will have a wonderful view of the French Gulch Mining Valley from here. This trail is a little over 2 miles out and back. This is also a great snowshoe trail.

Sapphire Point – (Scenic Overlook) – From Main Street drive North, as if you are going to Frisco. After about five miles you will come to a traffic light where you will see Summit High School on the left and Swan Mountain Road to your right. Turn right and continue up to the summit (approx. 5-7 minutes) where you will see a small parking lot on the left. The overlook is approximately ¼ mile ahead, with spectacular views of Lake Dillon. From there, the trail continues in a short loop back to your car.
 
Reiling Dredge Trail – From Main Street turn on to Wellington Road. Follow Wellington road 1.1 miles to the intersection of Wellington and Reiling road. You will now be on French Gulch road. Stay right and follow French Gulch road as it turns to dirt and then continue past the Country Boy Mine on the right. From the Country Boy Mine, the entrance to the Reiling Dredge Trailhead is one mile on the right hand side. It is now well-marked, but there is a wooden trail marker directly across from the parking lot on the right side of the road. Park in the lot on the left and walk across the road to the trailhead. Follow the trail across the creek to the Reiling Dredge. This is a short, easy walk of less than a mile out and back. This is also a great snowshoe trail.

Iowa Hill Trail – This is a one mile loop in a mining area with interpretive stops along the way. The trail winds its way up and then down a hillside. From Main Street drive North on Hwy 9 (you will pass through the roundabout). Turn left on Valleybrook Road and then right on Airport Road. After .25 miles the Iowa Hill Trailhead will be on your left, directly north of the Publics Works facilities. As you turn in, stay right and drive up the dirt road to the second Iowa Hill trail sign. This is also a great snowshoe trail.

Burro Trail – Drive south on Hwy 9/Main Street and turn right onto Park Avenue. Continue on Park for one block and then turn left onto Village Road. Continue for a couple of blocks to the parking lot on your left just before Beaver Run Resort hotel. Enter the lot and continue driving to the far left corner of the lot and exit at the sign that says “County Road.” Park here. Follow the dirt road until you see a pole fence on the left. Go through the gap in the fence and cross the ski trail between lift tower 5 and 6. You will see a sign for the Burro Trail straight ahead. It eventually intersects Spruce Creek Road. From here you can turn back, or continue on to the Spruce Creek Loop or Mohawk Lakes Trail. Approximately six miles round trip.

Sawmill Trail – This is a 1.5 mile round trip up to the Sawmill Reservoir and back. This hike is accessible from town and great for kids. Go up Four O’ Clock Road and continue uphill for .3 miles. At the intersection of Four O’ Clock Road and Kings Crown Road, turn left and the trailhead is located immediately on the right next to the Snowflake Lift.

Visit the Summit County Explorer website for detailed descriptions of Breckenridge hiking trails in the area.

Saturday, April 9, 2016

Disc Brakes on Road Bikes?

Disc brakes on road bikes. I haven't seen a technical innovation that's caused as much controversy since - well, since Shimano invented a little thing called Di2. Sure, there's a lot of hand-wringing about their place in the professional peloton, but in terms of the rest of us riding around, are they worth the extra expense?
As a staff member at one of Sydney's biggest bike shops, I've been building, riding and servicing road bikes with disc brakes on a daily basis for the past two years, and on mountain bikes for a lot longer. I've also talked to many other mechanics who work on them on a daily basis.
Here's a no-nonsense look at the pros and cons of road disc brakes, and whether you need them
on your bike.

They work better than caliper brakes in almost every way
From a functional perspective, the marketing hype is all true. Road discs, when they're properly adjusted, are the mutt's nuts when it comes to every aspect of braking.
It's not just about getting more stopping power under you, however. Discs don't actually give you that much more stopping power than a decent caliper brake. However, the difference is all at the lever. You've got much more control over the amount of braking force you use, and it requires very little power from your fingers to apply that force. Plus, it feels buttery, buttery smooth - no cable friction here - and you get very similar performance whether you're riding in the wet or the dry.
Let me say that again, because it's the most important point: braking in the wet is significantly better.
Sure, you can still skid out or lock up just as easily, and the amount of grip from your tyres is critical, but disc brakes make much more sense in the wet.

Maintenance
Of course, all of the above depends on those brakes being properly adjusted and in flawless working order. The generation of brakes that are specced on 2015 and 2016 model year bikes are practically issue-free.
From a workshop point of view, road hydraulics need very little maintenance, aside from an occasional bleed and pad replacement. There are a couple of quirks.
First, some riders have complained about their pads constantly rubbing on the rotors. Almost down to a man, this is because of the quick release lever not being done up tight enough and not holding the rotor in place securely enough.This will become less of an issue as we see more road bikes equipped with the through-axles rather than quick-release skewers.
To prevent this, you need to do up the quick-release skewers a fair bit tighter than you may be used to. This is all well and good for us mechanics, with our fingers constructed of sprung steel, but this can be challenging for mere mortals. All I can say is, get working on your finger exercises.
Complaint number two is squealing brakes. This is a fact of life with disc brakes, and every mountain biker for the past 20 years has learned to love the siren song of the rotor. The chief culprit for this is dirty and/or contaminated pads. The only way to prevent this is to clean your brakes. Get some disc brake cleaner, get a clean rag - and I mean clean, not covered in chain lube or yesterday's lunch - and wipe over your rotors when you get home from a ride, especially if it's a wet one. You will save a lot of money on pads in the long run.
Here are some more useful maintenance tips for road discs.

Racing wheels
Here's the elephant in the room. So, discs might be getting trialed by eight professional teams this year, but unless you're slipping the commissaire fifty bucks every time you race, you cannot, should not and will not be allowed to race on a disc-equipped road bike for at least another 15 months.
So, if you enjoy lining up at the local crit or road race on a Sunday morning, you'd better resign yourself to the fact you won't be doing it on your shiny new road disc bike. Either that, or take up cyclo-cross.

Yes or no?
From a functionality and maintenance point of view, disc brakes are a huge leap forward from the caliper brakes we're used to on road bikes. Seriously, the difference when riding is like the difference between alloy and carbon frames, or between mechanical and electronic gear shifting. It's hard to go back to calipers once you've got used to the control that discs give you, especially in wet conditions.
However, it depends on you and the kind of riding you do as to whether you should rush out and buy one today. If you're looking for a bike for the morning bunchie, to ride in gran fondos and to commute on, you absolutely should consider it as an option. However, if you're a weight-weenie racer or like to keep your options open on wheel choice, then perhaps hold off for a couple more years.
When the brake pads are replaced or if accidentally the brake lever is pressed without a rotor or spacer between the pads, you will have to reset the brake calliper pistons. Basically resetting your b - See more at: http://blog.rahoxbrakes.com/2014/10/how-to-reset-mountain-bike-disc-brakes.html#sthash.SeQ3oy2M.dpuf

How to reset mountain bike disc brakes - calliper pistons

When the brake pads are replaced or if accidentally the brake lever is pressed without a rotor or spacer between the pads, you will have to reset the brake calliper pistons. Basically resetting your brake pistons is just only pushing your calliper pistons back to their original position. It is an easy task, and will ease the new brake pads installation.

Shimano M615 brake with the pads fully retracted
Shimano M615 brake calliper with fully retracted pads as it comes from the factory

  1. If you are going to change or upgrade your mountain bike brake pads the easiest way to reset your pistons is without removing the worn brake pads. Remove the wheel and just put a large flat blade screwdriver between the pads and twist pushing the pads apart until the calliper pistons are retracted to its original position. You will get enough room to clear the new brake pads and the brake rotor.

    Tire lever to retract the mountain bike brake pistons
    Push the pads apart until they are fully retracted to the original position

    If you want to use this method but you don’t need replacing the brake pads and want to avoid scratching your current brake pads, you can use any other softer tool (tire lever for example), or just wrap the screwdriver blade in electrical tape and follow the same twisting procedure. 
    If the brake pistons don’t move back enough to clear the brake rotor, or there are very hard to retract is often because there is too much brake fluid in the system causing the lock. In this case you will have to remove any excess brake fluid from the system, unscrewing a bit the top bleeder at the master cylinder or removing the fluid reservoir top cap. Always try first with the top bleeder or reservoir top cap to avoid air entering the system. Catch the excess brake fluid with some paper towel and be careful and cover your brake pads to avoid brake fluid splash ruining them. Tighten the bleeder or reinstall the reservoir top cap and you are done.

  2.  If you have removed the brake pads, you can retract the calliper pistons with a tire brake lever or similar “soft” tool to avoid scratching the surface of your calliper pistons. Press both pistons until they are fully retracted into the calliper body.

  3. Now install the new pads, the wheel and “set” the brake pistons to the correct position by pressing the brake lever hard 2-3 times. After this setting you should have full power, but if you have removed some fluid from the brake system and feel your brake spongy, you should bleed your brake system following the Service Instructions of your brake system manufacturer. Search the links below for detailed information from the main mountain bike brake manufacturers.
- See more at: http://blog.rahoxbrakes.com/2014/10/how-to-reset-mountain-bike-disc-brakes.html#sthash.0z8JKrGB.dpuf