Saturday, July 30, 2016


What Kind of Biker Are you? Road or Mountain?


Let’s get one thing clear right away. When we say biker, the Hell’s Angel variety is off the table. We’re talking non-motorized here, people. And yes, there are all sorts. To name just a few:

The Pub crawl cruiser

The bike is the ideal means to get to the next bar faster. You also like it to serve as a conversation piece when you saddle up for the jaunt to the next watering hole. And, of course, you want to look good riding it.
Ride: Main Street, out and back
Outfit: Sun dress, baggy shorts, flip flops. Don’t forget the perfect costume for Breck Cruisers.
Type of beer: You-Call-It
Money invested in gear: $50-$500

The Tandem

You prefer to pedal when your honey’s bringing up the rear and when there are no super steep climbs or descents.
Ride: Breck to Frisco and back on bike path.
Outfit: Brightly colored jerseys and socks (matching) and high quality spandex.
Type of beer: wine
Money invested in gear: $500 to $4,000

The weekend road warrior

Your days off are dedicated to getting your blood flowing and your heart rate up via some semi-intense pedaling on the skinny tires. Well, semi-intense for a few minutes at a time, anyway, with plenty of photo breaks.
Ride: Breck to Keystone around the lake and back (unless the Summit Stage is calling your name at the high school).
Outfit: New Belgium jersey and mid-grade spandex purchased at REI
Type of beer: Fat Tire or Breckenridge Avalanche
Money invested in gear: $700-$3,000

The Casual mountain biker


A rainbow of flowers greet cyclists all summer long.
The elevation gets to you when you grind in granny gear for extended climbs, but you love the challenge of riding over obstacles and through (shallow) creeks. Too many roots and rocks are a little scary.
Ride: Flume Trails
Outfit: Baggy mountain bike shorts and not-too-tight jersey from Pearl Izumi or local outfitter.
Type of beer: Any IPA will do
Money invested in gear: $400 to $4,000

The Hard-core mountain biker

Those casual riders better MOVE when you’re rocketing down the single track. Your ideal day is never seeing pavement. You carry at least a gallon of water with you, rain jacket and at least two spare tubes at all times. You can fix a flat in less than three minutes.
Ride: Flumes to Colorado Trail to West Ridge, down into Keystone, back up through Summit Cove, down trailer park switchbacks to Gold Hill and Peaks Trail back to Breck. Or out-and-back on the Wheeler Trail.
Outfit: High-end baggy shorts or spandex with thick butt pad, long-sleeve jersey and full-finger gloves.
Type of beer: Stout or PBR
Money invested in gear: $3,000 to $10,000


USA Pro Cycling Challenge wannabe

If the pros can ride it, so can you. You think you could probably take down some of the stragglers in that race if you had the chance. You have ridden every stage of the Challenge and clock the Breck time trial loop at least once a week, keeping meticulous track of the seconds you shave off.
Ride: Anything marked with a Pro Cycling Challenge sign or anything involving at least 5,000 feet of climbing.
Outfit: Tight-fitting Euro brands, wraparound sports sunglasses.
Type of beer: Michelob Ultra
Money invested in gear: $8,000 to $20,000

The BMXer

You loving catching air in the skate park or over dirt jumps. The daily “grind” doesn’t get you down.  After a long day at work, you hop on your bike and your buddies are skating behind you to have an evening at the parks. Heck, the streets obstacles are just as fun as the park. You usually find yourself bunny hopping around town.
Ride: The Wellington Bike Park, the Breckenridge Skate Park or the streets in downtown Breck.
Outfit: Skinny jeans and t-shirt.
Type of beer: PBR or IPA
Money invested in gear: $500 to $1,200

Thursday, July 28, 2016

Five Do-It-Yourself Remedies For Plantar Fasciitis

The right kind of self treatment can help you knock out Plantar Fasciitis, a common and annoying injury.
Experiencing persistent pain and stiffness in the bottom of the heel or foot? The cause of this either sharp or dull discomfort could be plantar fasciitis, inflammation
of the thick tissue, or fascia, that runs along the bottom of the foot. Common among distance runners with chronically tight hamstrings, back, calves and Achilles tendons, or those who run in shoes without proper arch support, the condition may also be caused by a muscular imbalance in the hips or pelvis. This imbalance can cause slight compensations in the stride that place more stress on one leg than the other, according to San Diego-based running coach Jon Clemens, who has a master’s degree in exercise physiology. While correcting the imbalance permanently requires a strength program that focuses on balance, calf- and pelvis-strengthening drills, said Clemens, treatment to temporarily relieve the inflammation can be performed easily at home.
RELATED: The Five Most Troublesome Running Injuries
In addition to stopping or reducing running, Clemens recommends completing this daily regime until the pain subsides.
1. Stretch the fascia. Prop your toes up against a wall, keeping your arch and heel flat so the toes stretch. Hold for a count of 10. Repeat 10 times three or four times per day.
2. Roll a frozen water bottle under the arch. “Stretch first then roll out the arch for 10 minutes; you don’t want to stretch the tendon when it’s ice cold,” Clemens said.
3. Freeze a golf ball and massage the fascia. Roll the frozen golf ball under the foot, starting from the front and working your way back. Put good pressure on each spot—the medial, center and lateral positions—for 15 seconds before moving to the next area. Then, roll the ball back and forth over the entire foot.
4. Foam roll all muscles on the body above the plantar. “Even tight shoulders can cause the condition, as your arm swing can throw off proper hip alignment and footstrike,” Clemens said.
5. Bump your arch. “Get a commercial insole with an arch bump to push on the plantar and keep it from flexing—it doesn’t matter if you’re an under or overpronator; the plantar needs to be supported and strengthened,” Clemens advised. “Wear the support in all shoes, if possible.”

Tuesday, July 26, 2016

How To Choose The Most Comfortable Bicycle Seat

Commuting by bike shouldn’t be a pain in the butt. If it is, it’s time to seek out a comfortable bicycle seat. Here are a few things to consider before swapping out
your bicycle seat.
Check your pants. If you’re throwing on a pair of jeans and pedaling off to work, chances are your tush isn’t going to be happy for long. Most pants have seams in all the wrong places. Try some cycling pants with a padded chamois instead.
Asses your setup. A saddle that’s too high causes your hips to rock and places excess pressure on your tender bits. The same goes for a bicycle seat that isn’t level.
Move around. Pain can result from constantly sitting in the same position and not standing up. Get up and shift around on the saddle every so often.
If your sit bones are still screaming, it’s time to look for a new saddle.
Don’t take your friend’s advice. A saddle is very personal to each rider. Your weight and the width of your sit bones factor in to the overall fit. Work with a bike shop to help measure your sit bones and then suggest certain saddles. Many shops also have demo models for you to try.
Saddle shape. Most saddles come in narrow or wide shapes. If you’re experiencing chaffing or rubbing on your current saddle, look for one with either a thinner nose or that is less rounded in the back. Women often require wider saddles, but this isn’t always the case. Some women are more comfortable on a men’s saddle.
Cutouts and other considerations. A cutout or acutaway is designed to shift pressure away from the soft tissue and onto the sit bones, which can handle more bodyweight. Most saddles are made from injected-molded plastic and sometimes carbon fiber is mixed in to help the saddle flex under the rider’s weight. Bicycle commuters should opt for comfort over weight. That said, don’t opt for the most padding you can find. Padding might feel great at first, but it tends to migrate as you ride, placing excess pressure on your soft tissue.
Test ride. Like any new relationship, you won’t know if it’s right until you spend some serious time together. Don’t just press down on a saddle’s padding in the shop or sit on it briefly. Take it out for a ride….or 10! Your body also needs to get accustomed to the saddle, which may mean discomfort at first. Stick with it and keep testing until you find the one.

Saturday, July 23, 2016

Headwind and Cycling Through

Nothing is a bigger slap in the face to a cyclist than cycling through a headwind. A sudden gust will quickly zap your energy, motivation and speed. But you don’t
have to let a stiff breeze get the best of you. You just have to know how to fight back.

Dress the part

Cycling in baggy clothing will quickly turn you into a giant parachute. Wind loves excess fabric, so dress in a form fitting jersey or jacket with lycra shorts or tight-fitting pants. If you remove the jacket, stash it tightly in the rear pocket of a jersey instead of tying it around your waist where the loose sleeves could dangle and get caught in your spokes. Also, pay attention to the aerodynamics of your bike opting for panniers or a single wheel touring bike trailer, over backpacks and messenger bags. Remove any excess zip ties, mounts or lights that you aren’t using.

Hide out 

You may not have a fancy carbon bike with a low stem and drop bars, but you can still learn a few tricks to get into a lower position and hide out from the wind. Regardless of the bike you’re riding, when a headwind hits, you want to get as flat-backed as possible. Grab the tops of your bars, bend your elbows, slide back on your saddle and ride in a flatter, more crouched position. If you have drop bars, use them.  Keep your elbows loose and relaxed and watch for cross winds that could suddenly blow you into another direction. If you can, ride in an area sheltered by buildings or trees. 

Don’t be a slave to speed

Face it: your speed will always suffer when cycling through a headwind. You can either fight it and burn out your engine early or anticipate a lower speed and roll with it. This usually means shifting into a lower, easier gear. Don’t soft pedal. Keep some tension on the pedals and spin a nice smooth gear that you can maintain.

Begin by cycling into the headwind

If you don’t have a set bike route, try to begin your bike ride by cycling into the headwind and finish with a tailwind when you’re low on energy. Riding home with a tailwind is also a mental boost after you’re tired from fighting a headwind. Wind can be mentally defeating, so it’s important to realize this early on and see it as a challenging way to boost your fitness or burn a few extra calories.

Thursday, July 21, 2016


How (not) to clean your bike

Bike cleaning
Cleaning your bike is something you do less than you should
. We don’t all have pro mechanics to hand, waiting to take the bike off us immediately after our ride with a big sponge in their hand. Yet there’s nothing quite like riding a freshly cleaned chainset. You can see the cyclist’s dilemma. We can’t go out and buy a new bike every time we get our bike dirty. Well, not all the time anyway.
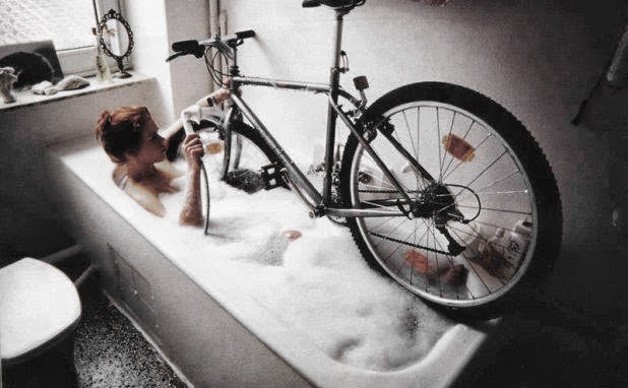
Cleaning your bike is horrible. For years I managed to clean mine in a one bedroom flat with no garden, commandeering the bath on the promise I’d leave the room as clean as I found it. Bike upside down, I would dress the room in more plastic than your average murder scene. Most of the time I would fall in to the bath. Here then is a basic guide of how not to clean your bike, the benefits and also a cheat’s guide to cleaning it quickly.

Preparation

  1. Get bike dirty. No point going to all that effort for nothing. Ride your bike through puddles with abandon. Take it to the beach. Take it tomato throwing in Spain.
  2. Think about cleaning your bike. For a really, really long time. Pencil in a date and then steadfastly find other things to do instead. Really important things. Like flossing or folding your pants.
  3. Purchase appropriate cleaning products aka find whatever it is you clean the toilet with and use that. It’s just detergent, right?
  4. No sponge? Fear not, this is why somebody invented fashion. Your girlfriend/boyfriend will never miss that expensive FCUK rag they loved so much last year. Rip it up. It’s soooo last season.

Cleaning

The big day has finally arrived when you can no longer put bike cleaning off any longer. Your bike holds so much mud a colony of worms has moved into your dérailleur.
  1. Huff and puff. A lot. This shows anyone who dares get within ten feet of you how much you mean business. Today’s the day.
  2. Begin like all pro mechanics by standing the bike upside down and resting it on the seat and handlebars.
  3. Stare at bike, hands on hips. Get a brew on and return an hour or so later after being distracted by more important things. Like that last piece of cake in the cupboard.
  4. Inspect bike and be amazed at how you cycled for long with what looks like the contents of the local farm attached to your chain.
  5. Clean your chain. Find an old of toothbrush / somebody else’s toothbrush and attack the chain links. Degreaser will help, just remember to use the Fairy Liquid lightly, a little goes a long way and you’ve a row of neatly laid out plates to clean afterwards.
  6. Chain done, find a screwdriver small enough to fit in your cassette. Blindly gouge out any mud, spare change or anything else you find.
  7. Get the garden hose on the go and lightly douse your precious. No hose? Fear not. Throw a bucket of water in the vague direction of your bike.
  8. Find any kind of squirty cleaning liquid you can and spray it everywhere.
  9. Leave bike to soak and admire the fresh lemon smell.
  10. Rub bike vigorously with old rag being careful not to scratch the paintwork.
  11. Repeat step 7 until bike looks shiny-ish.
  12. Leave to drip dry or take it for a ride

Post-clean

  1. Spray WD40 everywhere. You’ve no idea what it does but it smells rather nice. Walk through the fine mist of grease so when you get back inside you’ll smell ‘pro’
  2. Grunt, satisfied with a job well done
  3. When asked how it was, Easy, you will exclaim whilst conveniently forgetting the process has taken you four hours
  4. Now all that’s left to do is ride. On very, very dry roads. Dirt is your arch-nemesis once more.

A cheater’s guide to cleaning your bike

Glad I cleaned the bike with a toothbrush last night
  • Don’t get it dirty
  • Pressure wash on low, taking great care to avoiding the bearings in case you wash out the bearing grease
  • Buy new bike when things start breaking
  • Apply cling film to all non moving parts
  • Get mudguards
  • Don’t spend a fortune on bike specific cleaners but do avoid foamy detergents
  • Become a fair weather cyclist
  • Move to a dry country
  • Take up indoor track riding
  • Leave bike on roof of car during the next drive though car wash
  • Get a quick link for the chain so you can remove it and leave it in degreaser / diesel overnight
  • Buy a massive sponge
  • Clean a regular basis to avoid the dreaded forensic deep clean
  • The indoor turbo is your friend
  • Invest in bike brushes and dust off bike when mud is dry (this works really well)
  • Ride single speed with a thick chain that you never have to clean (great for commuters)
  • Polish your bike with pledge – mud won’t stick to is so much and you’ll smell great on the next club run
  • Buy a bike stand if you have space – they really do make a big difference
  • Wet wipes can make a frame sparkle in no time at all
  • Wear gloves otherwise it’ll take you longer to clean your fingernails than your bike
  • It’s OK to use WD-40 – I use it on the hard to reach pivots on gears to keep them moving. You could use it on your chain too, so long a you pretty much re-applied after every ride as WD-40 is a very light oil. Baby oil and vaseline are numbered amongst its ingredients! Sure, it will act as a degreaser but it will leave behind a light layer of oil too.

The benefits of cleaning your bike

  • Smooth gear shifting
  • Your bike will run quietly
  • It’ll look shiny again. Or matt black if you went for the batman bike.
  • A chance to check if your chain is worn before it destroys your chain set
  • You can see any damage to your bike
  • Take flint out of your tyres to avoid impending punctures
  • A chance to grease all moving parts and prolong their life (does not work on knees)
  • You’ll feel boss on your next ride
  • You’ll also be (mentally) quicker with those smooth spinning cogs of yours!
  • Fellow riders will take you as a newbie debuting their new bike. You know better
  • Your bike and its components will last longer
  • Thanks to the above you’ll save money

Monday, July 18, 2016

Clipless Bike Pedals for Commuting by Bike

If you think fancy cycling shoes and clipless bike pedals are only for serious road racers and mountain bikers, think again. Even if you only put in a handful of miles on your way to work, using specific shoes and bike pedals have benefits,
including increased speed (and who doesn’t want that!).

The skinny on clipless bike pedals

If you’re pinching pennies, just started riding a bike or don’t ride very often, flat pedals are still a sound solution. But if you want to get a little more serious about cycling, then consider going with clipless bike pedals. Just as ski boots clip into a ski binding, clipless bike pedals are used with special shoes that have a cleat attached at the sole of the foot. Push the cleat onto the pedal to engage it and then kick or twist your heel out to the side to “unclip” and free your foot. The good news is that most clipless bike pedals are adjustable, so when you’re just starting out, you can adjust the pedal to disengage under very little force. Most clipless bike pedals also have a certain degree of float, meaning your feet can move a few degrees from side-to-side while still clipped in. This float is your knee’s best friend and allows the body to move naturally.

Swap bike pedals, go faster

If you’ve ever lost control of your pedal and suffered a serious scrape to the shin, you’ve experienced firsthand one of the bummers of flat pedals. Clipless bike pedals allow riders to shift positions or navigate obstacles without their feet slipping. One of the major benefits of going with clipless bike pedals, however, is that it increases the efficiency of the power transfer between the rider and the bike. Essentially you’ll be wasting less energy and putting more of it into flying forward. Better pedaling efficiency means the potential to go faster or to break through a headwind using less power.

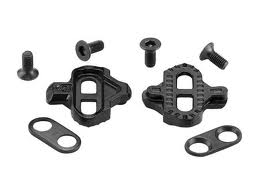
clipless bike pedals and components

Shopping for clipless bike pedals

Buying clipless bike pedals and shoes can feel overwhelming. There are cleats and shoes with two, three and four bolts. Some are recessed into the shoe and other cleats are thick, making walking any distance nearly impossible (as well as comical). If you’re mainly using the shoes for commuting or touring, stick with mountain bike or casual style shoes. Prices vary, but the more expensive ones tend to be lighter, well vented and stiffer. It’s important to find a shoe that fits well and complements your riding style. Most of these shoes will have a two cleat SPD hole pattern on the bottom and are great for commuting because the cleat is recessed, so you won’t be stepping on it off the bike. On the other hand, many road cyclists prefer cleats that aren’t recessed and stiffer shoes for the most efficient power transfer. However, these cleats are bulky and aren’t recommended for walking very far.

Before you clip in

Going clipless can be daunting at first. Just like any other skill, it takes practice. Before hitting the bike lane or stopping at a busy intersection, take some time to practice clipping in and out repeatedly. This is best done on soft grass. It will take some time before clipping out becomes second nature. Since your feet are held in one position on the bike, it’s also important to be sure your bike fit is spot on. Ask someone at your bike shop to check that your cleats are properly positioned and if you experience any pain, get your bike fit checked out right away.

Saturday, July 16, 2016

Used Bike | Shopping Online

If you’re in the market for a new ride, don’t overlook the market of used bikes. Just as a used car can save some serious dough, a second-hand bike can offer
many of the same benefits. Not to mention, buying a used bike is one of the best forms of recycling. When it comes to the internet, the sky is the limit on used bikes. Here are a few tips on how to go green without snagging a lemon.

Know what you’re looking for 

Internet shopping can feel overwhelming, with literally every bicycle size, color and price point available right at your fingertips. Before you begin browsing, have an idea of what you do and don’t want and what you’re willing to spend. This means test riding your friend’s bike or scouring the websites of various road bike companies for their sizing information. Remember that sizing varies between companies. If you have a current bike that fits, take those measurements to use as a guideline. Under no circumstances should the price of the wrong size used bike lure you in to making a purchase. Fit should always come first.

Be a smart shopper 

If you know exactly what you’re looking for, set up a search on eBay. This is simply done by entering a search term and then clicking “save search.” Then eBay will email you every time your search comes up with a match.

Find a reputable used bike seller

If you’re interested in snagging a deal on eBay, first look into the seller’s rating and feedback. Read other buyer’s feedback and feel free to ask the seller any questions. How quickly do they return your email and do they seem upfront about the condition of the bike? The same goes for a purchase made on Craigslist.  Don’t be afraid to ask what regular maintenance was preformed, how many miles are on the drive train, if it was ever involved in a crash and what weather conditions the bike was ridden in. If the seller is vague or hesitant to answer, consider this a red flag and move on. Be sure to closely examine any photos, especially those featuring blemishes, chipped paint or other potential damage.

Fortunately eBay and Paypal have several levels of built in buyer protection, as well as a return policy. Most bicycles do not, however, come with a warranty.  Craigslist does not offer this protection, so don’t be afraid to do a little extra research before making a purchase this way and always examine the bike in person before purchase.

Be kind to your local bike shop

Many local bike shops offer used bikes or will match or beat online prices, so don’t forget to begin there. And follow some basic bike buying etiquette. Don’t be the rider who spends three hour working one-on-one with a sales rep testing riding bikes, only to jump online an hour later and purchase the bicycle there. It’s also tacky to ask a bike shop for help wrenching after you brag about your new online score. Bike shops will often work with loyal customers to help find what they’re looking for.

Elevation has several used bikes for sale.  Support your local bike shop.
http://elevationskiandbike.com/cart/packages.php

Friday, July 15, 2016

Water for Hiking

Water

Don't even think of starting on a hike that takes you more than a mile from home without a bottle of water along. You should have at least two quarts of water with
you and drink 1/2 to 1 cup every 30 to 45 minutes. Keep the water coming into your body even if you don't really feel very thirsty. If you are hiking, you are losing moisture and you need to replenish it.
By the end of a 4-hour hike, you should have drunk both quarts of water and you should be able to use the toilet. If you don't need to, then all that water came out as perspiration and you still need to drink more water to stay hydrated. After a hike, you should drink additional water until you need to use the toilet. I don't mean chug it down, I mean drink a 1/2 cup or so every 5 minutes or so.
Water is THE most critical survival item - whether in the wild or at home.

Rule of 3:
  • You can live 3 minutes without air.
  • You can live 3 days without water.
  • You can live 3 weeks without food.

You'll have air to breathe unless you're under water or in a cave-in.  If you run out of food, you can struggle on for 150 miles if needed.  But, if you run out of water, you have only a day or so to figure out a solution.

Water Needs
How much water do you really need? Does it matter where you are, the time of year, or the elevation?

Water Treatment
Once you locate water, you're not home free. There're lots of critters living in that water and they'll make life miserable for you. It's a good idea to treat all water you find and here's how to do that.
Carrying Water
Now that you have all the water you need, your stomache will only hold so much. You need to carry the rest down the trail until you find more water. Secure, comfortable, inexpensive transportation of water is the key.

Wednesday, July 13, 2016

A Quick Guide to Bike Lights | Bicycle Safety

In recent years, bike light technology has gotten lighter, brighter, cheaper and easier to mount to an array of bikes. Blinded by too many choices? Read on to find the best bike lights and bicycle safety tips.
 
Cover your front and rear. Whether you’re riding home under the setting sun, the glow of streetlights or in total darkness, it’s important to always display a white light on the front and a red light on the rear.

Headlights: Before you buy a headlight, consider how it will be used. Do you need it to see or be seen? Inexpensive LEDs make poor headlights, but are effective at helping drivers see you. If you’re in an unlit area, consider using a dedicated headlight (more on that later) as well as a blinking white light. Look for an inexpensive LED such as a Knog, which offers a variety of highly visible lights in different flash patterns, including strobes.

Taillights: Taillights typically mount to the back of your seatpost or seat bag. A light that’s longer and contains more LEDs is more visible than a single light. Blackburn and Cateye make a variety of taillights for commuters. Some even have a larger light pattern to provide side lighting.

If you ride with a bicycle trailer that attaches to the rear of your bike, make sure this attachment is ALSO lit up from the back and side.  Maya Cycle bicycle trailers and other brands provide a flag that attaches to the trailer so that it is visible when following your bike, attach a flashing light to your flag post if possible and in addition, use a flag that has a reflective material to help it’s visibility by motorists.

Other considerations. While the battery life of inexpensive LED lights has improved, it’s important to recharge or replace your batteries often and to know roughly how long the battery’s life is (don’t rely on the manufacture’s claim). If you have space, keep an extra light or extra batteries in your bag.  Also consider the size of your seat post and handlebars and be sure the light’s mount is compatible with your setup.

Light up unlit areas. If your bicycle commute takes you into dark areas, you’ll need to look into a powerful headlight, either a high-powered LED, HID or halogen. These lights, which mount to your helmet or handlebars, typically produce two light patterns, wide and narrow. LED lights are generally pricier than halogens, but they emit a brighter light and have a longer battery life. HID lights more resemble a car’s white lights and are very bright, but also quite pricey. Mountain bikers often opt for HIDs, which can be overkill for commuters and downright blinding to motorists.

Keep in mind that the lights have large batteries, which are typically stowed in a jersey pocket, bottle cage or on your frame. Look for a model with rechargeable batteries and conserve battery life by using the narrower light beam when possible. Always charge your batteries between uses, and keep in mind that the faster you ride, the brighter your light must be.

Monday, July 11, 2016

Navigating a Hike

  Seriously, if you don't know how to read a topographic trail map and use a compass, then don't go hiking. Seriously. Having someone in your group that
knows how to use them is not good enough. You'll get separated from him and then you'll be in big trouble.

You really should learn How to Use a Compass - its a good tutorial describing maps, compasses, declination, topography, and more.

Stay On Course


 On many frontcountry hiking routes, such as state parks and nature centers, all you need is a simple trail map of the area. It's only a few miles on a well-traveled route so your chances of getting lost or injured are pretty slim. But, even there, a thunder storm, accident, or recent trail damage may force you to take a detour and lose the trail.

On backcountry treks, understanding a topo map will help you plan where the more difficult steep ascents are and where you will have nice views from high ridgelines or be stuck in a gully with no view but the trail ahead. By reading a topo map at home, you can visualize what the terrain looks like even before you ever see it. You'll know the name of a high mountain in the distance and more importantly know it is East from where you are hiking in case you become disoriented.

Your compass is the other half of the navigating toolset that you need to bring. In some areas with enough visual landmarks, you can do just fine with a map alone. A compass alone can keep you heading in a certain direction, but you don't know what you are heading towards. For all areas, a map and compass together can get you home along the safest of routes. Using your compass to orient yourself and your map and then identifying objects on the map in your real world will keep you going the right direction.

Global Positioning Systems are very common now. Unfortunately, some people think they are magical devices that keep people from getting lost - Nope! They are useful tools, but you still need to know how to use your specific model and you need a trail map. And, if they run out of batteries, get wet, or break, then it would be a good idea to have a compass as a back-up.

Sunday, July 10, 2016

Dogs and Bikes | Bicycle Safety

Every time I pedal up the hill near my house, he’s there. Yapping and jumping, his tiny legs run laps around the bike as I struggle to climb with my Maya Cycle bicycle trailer full of groceries. I call him Ninja Dog and even though we’ve met roughly 50 times, he still displays the same Mini Pinscher persistence that raises
my heart rate in an instant. Luckily, Ninja Dog backs down as soon as I raise my voice and ride away from his yard.

Sometimes dogs and bikes don’t mix and commuting by bike can be challenging with a barking beast chasing you down the road. Here are a few bicycle safety tips on how to deal with a dog you don’t know or one who’s acting aggressive?

Begin with a firm command. You want to sound authoritative. “Stop!” “No!” and “Bad dog!” may be enough. I’ve also yelled, “get off the couch!” with some success. Some cyclists swear that just the opposite works as they coax the pooch in a soft voice. “Good dog.”

Know the dog’s MO. Most dogs put up a fight because they are either protecting their territory or see you as a giant squirrel that they can chase.  This is where some attitude helps. Make eye contact with the dog, prove that you’re not prey and safely move out of his territory. Also, try to ride through Fido’s lair at the same time as a passing car, when the pooch is less likely to chase.

Cue your sprinting legs. If the dog looks excited or like he’s just playing with you, stand up and sprint away from him as best you can. But if he has a look of aggression, cautiously sprint away until you have cleared his invisible territory. You can also try to throw the dog off by varying your speed. Approach him slowly and then suddenly sprint away.

Hit him between the eyes.  With water, that is. A sudden squirt from a water bottle will likely scare and surprise your attacker. I’ve had great luck with this one and it usually ends the confrontation immediately.

Watch your behind. Dogs like to approach from the rear and some dogs will start chasing after you have passed them.  If Fluffy tries to run beside you, guard your front wheel to keep from crashing if he runs in front of it. Scan for traffic and then veer into the road as you sprint away.

Protect yourself. If the animal is still aggressive, dismount and place your bike between your body and the dog. You can also carry a specific spray that repels dogs. If you are bitten, stay on the scene and call the police immediately.  You also have the right to report a dog that continually harasses you.

Saturday, July 9, 2016

Flat Bike Tire Quick Fix Tips

A flat bike tire is the most common mechanical problem for cyclists. While the idea of changing a flat sounds daunting, it’s actually an easy fix. To avoid getting
stranded (or surfing through half the contacts on your mobile phone), grab your wheel, a set of tire levers and an air pump and practice changing your bike’s tube.

Step 1: Remove the bike wheel

Begin by either unhooking or flipping the lever on the cable that clasps your brakes together. This ensures there’s space for the wheel to pass through the brakes. Then either unscrew the bolt or flip the lever on the wheel’s quick release and loosen it. If you need to replace the front tire, remove it. If the puncture’s on the rear tire, shift the chain to the smallest rear cog and then pull the derailleur back, sliding the wheel out from the chain.

Step 2: Locate the offender

It could be a tiny piece of glass or a sharp cinder that caused the flat. Hitting a pothole can also compress the tire, pinching a hole in the bike tube. Hitting a larger object like a rock will leave a gash in the sidewall of the tire, which is usually easy to spot. Start by checking the valve stem for damage and if it looks okay, fix your peepers on the rest of the tire, slowly scanning it for damage. If you locate something that doesn’t belong, carefully remove it.

Step 3: Remove the flat bike tire

Let the rest of the air out of the bike tire and then grab your tire levers and slide the edge of the lever under the tire’s stiff bead on the side opposite to the valve stem. Push the bead toward the center of the tire as you slide the lever underneath and move around the tire. If you can’t unseat the bead with just one lever, hook the first lever on a spoke and slide a second lever under the bead. Then carefully work your way around the tire. Once the tire is unseated on one side, carefully pull the valve stem out of the wheel. Inspect the tube and tire for damage and remove any sharp items. It’s crucial that you remove the sharp object from the tire or you’ll have another flat in your future.

Step 4: Replace the flat bike tube

While you can patch a tube, it’s still safer to replace it. Take the new tube, open the valve stem and blow enough air to just barely inflate it so it begins to take shape. Next insert the valve stem into the hole in the rim and slip the tube into the tire. When one side/bead of the tire is in the rim, repeat this step on the other side, using your thumbs to push the tire onto the rim, working from the valve stem out. Just be careful not to pinch the tube in the rim.

Step 5: Inflate the new bike tire

Before you begin adding air, take one last look to ensure that the tube isn’t sticking out of the tire. Then inflate the tire using either a CO2 cartridge or pump and reinstall the wheel. Don’t forget to replace your CO2 cartridge and tube so you’re prepared for the next time. 

Quick tips to avoid a flat bike tire:

  • Inspect your bike tires regularly for excessive wear, flat spots or any sharp objects
  • If you accidentally ride through glass, reach down with the palm of your glove and lightly scrape the bike tire as it spins (careful with the rear tire) or stop riding and spin the tire
  • Check your tire pressure every couple of rides and inflate it to the proper PSI. Under and over-inflated tires are both susceptible to pinch flats
  • Avoid riding through debris
  • Frequent flats? Talk to your local bike shop about using a more durable bike tube or tire
  • Ride with the right bike tools with you


10 Backpacking Gear Myths

It’s amazing how some backpacking gear myths persist, even when there’s ample evidence to the contrary. Here are my favorites.

 1. Two people can fit in a 2 person tent.

Most two person tents are a very tight fit for two people and there is barely enough  floor space for two sleeping pads making it awkward to do anything
except sleep.
Most two person tents are too small to actually fit two people unless they’re 8 years old. If you want *any* extra space in a two person tent, size up to a three person tent and make sure it as two separate doors, so you and your partner can get out at night to pee without falling over each other.

2. You’ll sleep warmer if you sleep naked in a sleeping bag.

Sleeping Naked in a Sleeping Bag is colder than sleeping in clothes in a sleeping bag (duh!)
No again. If you’re too cold in your sleeping bag, put on some long underwear and a hat or a down jacket. The math is simple: the more you wear, the higher the combined R-value of your night-time sleeping insulation.

3. You need to wear hiking boots to go backpacking

Salomon XA Comp 7 Trail Runners
Wrong. Most long distance hikers don’t wear hiking boots anymore. They wear running shoes which are much cooler to wear in hot weather, dry faster when they get wet, and are much softer than hiking boots so they don’t cause as many blisters.

4. You need a backpack rain cover to hike in the rain.

Backpack rain covers are a hassle: they get ripped, torn off and lost, and they don’t do a very good job at keeping your pack dry in rain anyway. Most experienced backpackers line the inside of their backpack with a trash compactor bag instead which is much more effective and less expensive.

5. You need a tent footprint to protect the floor of your tent.

Footprints are just an easy way for tent companies to milk you for more money. Tent fabrics has come a long way in the past 40 years and almost all tents have bomb-proof waterproof floors that aren’t going to wear out unless you live in them full-time.

6. Waterproof breathable rain jackets are breathable.

So-called breathable fabrics, such as Gore-tex and eVent, have been so over-hyped that their breathability claims are not believable anymore. If you want to stay dry in a rain jacket, get one with pit zips so you can vent your sweat the old-fashioned way by cracking a zipper.

7. You need a 4 season tent to camp in winter.

Most three season backpacking tents work as well in winter as during the rest of the year. If you expect heavy snow, a tent with steep walls is best, but there’s usually no reason you can’t camp in winter using your existing tent if you have a warm sleeping bag rated for cold temperatures.

8. Biodegradable soap is ok to wash with in streams and ponds.

Biodegradable soap is not safe to use in steams and ponds.
Nope. A lot of people I meet on backpacking and camping trips think that it’s ok to pour soapy water into streams and rivers if they use biodegradable Campsuds, Sea-to-Summit Wilderness Wash, or Dr. Bronner’s Castille Soap to wash their hands, shampoo their hair, or clean their camp cookware. Nothing could be farther from the truth. Getting any soap in a water source is not acceptable. The soap can cause all sorts of issues from increased nitrogen to actually causing significant harm to aquatic inhabitants. Plus, no one wants to drink water that you’ve washed yourself, your clothes or cookware with. Carry all dirty or soapy water away from water sources and bury or disperse it at least 200 feet away.

9. Waterproof hiking boots will keep your feet dry.

No again. Waterproof hiking boots are only as waterproof as the coating applied to their exterior which degrades rapidly with use, or the integrity of the Gore-tex lining which quickly breaks down with wear so they start to leak. Waterproof shoes, even those with so-called breathable liners, trap perspiration from your feet, which makes your socks damp and increases blistering. Except in winter, when waterproof boots can increase insulation by trapping warmth, you’re better off hiking in non-leather boots or shoes that have some mesh so that they drain and dry faster when you get the wet and your feet sweat.

 10. You don’t need to carry maps and a compass because you have a GPS.

No. You should always carry a map and compass and learn how to use them. GPS devices (including cell phones) can complement a map and compass, they don’t replace them. While battery-powered devices are a convenience when hiking, you can’t rely on them in the backcountry. GPS devices are power hogs and you don’t want to be stuck in a lurch with dead batteries with no idea where you are or how to get to safety.

Sunday, July 3, 2016

Wet vs Dry Chain Lube, Whats the Difference?


It’s one of the questions we at Muc-Off are often asked.. “What is the difference between your Wet and Dry Bicycle Chain Lube’s?” - and the answer on the surface is relatively simple.


At Muc-Off, they currently produce 2 categories of chain lube, Wet or Dry, with 2 different lube models in each category. Muc-Off Bio Wet Lube and Muc-Off C3 Ceramic Wet Lube sit within our wet category and Muc-Off Bio Dry Lube and Muc-Off C3 Ceramic Dry Lube in the Dry category.

Firstly, here is the reason for the two different categories. The Dry chain lubricants are formulated to be a thinner construction, with special additives that mean dust and dry grime are not able to adhere to the chain as easily, meaning a more fluid and frictionless chain motion and a lubricant that is more suited to dry or damp weather. What needs to be taken into consideration is that our Dry Chain lubes will wash off easier, due to the thinner nature of the formula and don't tend to have as much longevity before reapplication is necessary.

The Wet chain lubricants are formulated to be a thicker fluid with a highly increased resistance to rain and bad weather meaning they are tailored for wet to damp weather conditions. The downside to this ultimate protection and increased endurance is that your chain will likely ‘grime up’ in dry conditions meaning an inefficiency is possible if left on the chain for long periods of dry weather riding.


Plan your chain lube application!

The best thing to do is to try and plan your bicycles maintenance seasonally. Whether it’s a mountain bike, downhill bike, road bike, cyclocross or BMX - having a seasonal schedule to caring for your pride and joy, will make your bike easier and more enjoyable to ride! Obviously this schedule will be based on where you ride on the planet, northern or southern hemisphere, wet or dry country’s. Here in the US the weather is often unpredictable so this can be a little more difficult. Even so, we would suggest using Muc-Off Dry Lube from mid April until the beginning of October and Muc-Off Wet lubricants from the beginning of October until the end of March.


Classic or C3 Lubricants?

With the Classic Wet and Dry Lubes and our premium C3 Ceramic Lubes currently available from Muc-Off, we are often asked “which one is right for me?”.

The secret to the C3 Ceramic Chain Lubes are their unique ceramic coating that provides incredible durability and long distance performance on all bicycle chains. These innovative formulations also use Boron Nitride and Fluoro Polymers to ensure ultra low friction for ultimate drive chain efficiency, high performance and durability. If you’re looking for long chain oil service intervals and precision gear changes under race conditions, then our C3 Chain Lubes are for you!

Muc-Off Classic Chain lubes are also state of the art but these formulas has been derived from natural ingredients and made from renewable sources, to ensure that these lubes are biodegradable and kind to the planet. These more affordable lubes have all the qualities you would expect from a quality chain oil whilst also being the kindest to the planet.

Friday, July 1, 2016

How To Choose The Most Comfortable Bicycle Seat

Commuting by bike shouldn’t be a pain in the butt. If it is, it’s time to seek out a comfortable bicycle seat. Here are a few things to consider before swapping out your bicycle seat.
Check your pants. If you’re throwing on a pair of jeans and pedaling off to work, chances are your tush isn’t going to be happy for long. Most pants have seams in all the wrong places. Try some cycling pants with a padded chamois instead.
Asses your setup. A saddle that’s too high causes your hips to rock and places excess pressure on your tender bits. The same goes for a bicycle seat that isn’t
level.
Move around. Pain can result from constantly sitting in the same position and not standing up. Get up and shift around on the saddle every so often.
If your sit bones are still screaming, it’s time to look for a new saddle.
Don’t take your friend’s advice. A saddle is very personal to each rider. Your weight and the width of your sit bones factor in to the overall fit. Work with a bike shop to help measure your sit bones and then suggest certain saddles. Many shops also have demo models for you to try.
Saddle shape. Most saddles come in narrow or wide shapes. If you’re experiencing chaffing or rubbing on your current saddle, look for one with either a thinner nose or that is less rounded in the back. Women often require wider saddles, but this isn’t always the case. Some women are more comfortable on a men’s saddle.
Cutouts and other considerations. A cutout or acutaway is designed to shift pressure away from the soft tissue and onto the sit bones, which can handle more bodyweight. Most saddles are made from injected-molded plastic and sometimes carbon fiber is mixed in to help the saddle flex under the rider’s weight. Bicycle commuters should opt for comfort over weight. That said, don’t opt for the most padding you can find. Padding might feel great at first, but it tends to migrate as you ride, placing excess pressure on your soft tissue.
Test ride. Like any new relationship, you won’t know if it’s right until you spend some serious time together. Don’t just press down on a saddle’s padding in the shop or sit on it briefly. Take it out for a ride….or 10! Your body also needs to get accustomed to the saddle, which may mean discomfort at first. Stick with it and keep testing until you find the one.